AudioSwift for macOS transforms your trackpad into a MIDI CC controller for your virtual instruments. With a compact and wireless format, it can give you better CC curves than other hardware or iPad solutions. In this video tutorial we’ll go through the steps to configure AudioSwift and we’ll share some tips to improve your workflow.
In this article, I’ll show you two different ways to use the trackpad with AudioSwift for articulation switching in an orchestral library. For this tutorial, I’ll be working with the recently released BBC Symphony Orchestra Discover by Spitfire Audio, but you can use any other virtual instrument that has articulations.
The first method works on any DAW; it uses the Trigger Mode to send MIDI notes for key switching. The second method is by sending control change messages (CC) with the Slider Mode and works for Logic Pro X users via Articulation Sets. This way you can have two sliders for controlling expression (CC#11) and dynamics (CC#1), and a third one for switching articulations.
Triggering MIDI notes
The most common way to change articulations in a virtual instrument is triggering a MIDI Note On message. Each articulation is assigned to a MIDI note and they usually start in the lowest range of the keyboard, from C-2 and up. If you have as small keyboard, this range isn’t easy to access and if there are too many articulations for the instrument, it becomes a problem to remember the MIDI note that triggers the one you want.
With AudioSwift in Trigger Mode, the trackpad can be divided into different pads, each one with its MIDI note and a label to identify the articulation. In the library I’m using, there are two to four different techniques for each group of instruments. I divided the trackpad into 8 pads, changed the type to Drums and used two different banks to fill all the articulations needed.
AudioSwift in Trigger Mode
In Bank A, the bottom pads trigger the strings articulations which are the same for the violins, violas, cellos and double basses (except the basses don’t have tremolo). The top row only triggers two articulations for the brasses and woodwinds. In Bank B, I put the rest of articulations for the percussion instruments of the library. Use the keyboard shortcuts Z, X, comma and period to change between banks. Save the AudioSwift settings in Preferences > General tab for later recall.
If your orchestral library uses control change messages instead of MIDI notes for articulation switching, you can still use the Trigger Mode if you’re on Logic Pro X or Cubase. Logic Pro has the Articulation Sets and Cubase the Expression Maps, which are two features for receiving any MIDI message (a MIDI Note On in our case) and sending control change messages that the sample library can respond to. Check out each DAW or library user guide to set it up.
CC messages with the Slider Mode & Logic Pro X
Orchestra libraries accept two or three CC messages to control the sounds for expressiveness using sliders. With AudioSwift in Slider Mode, we can use a third or fourth slider in AudioSwift to trigger articulations right from the trackpad.
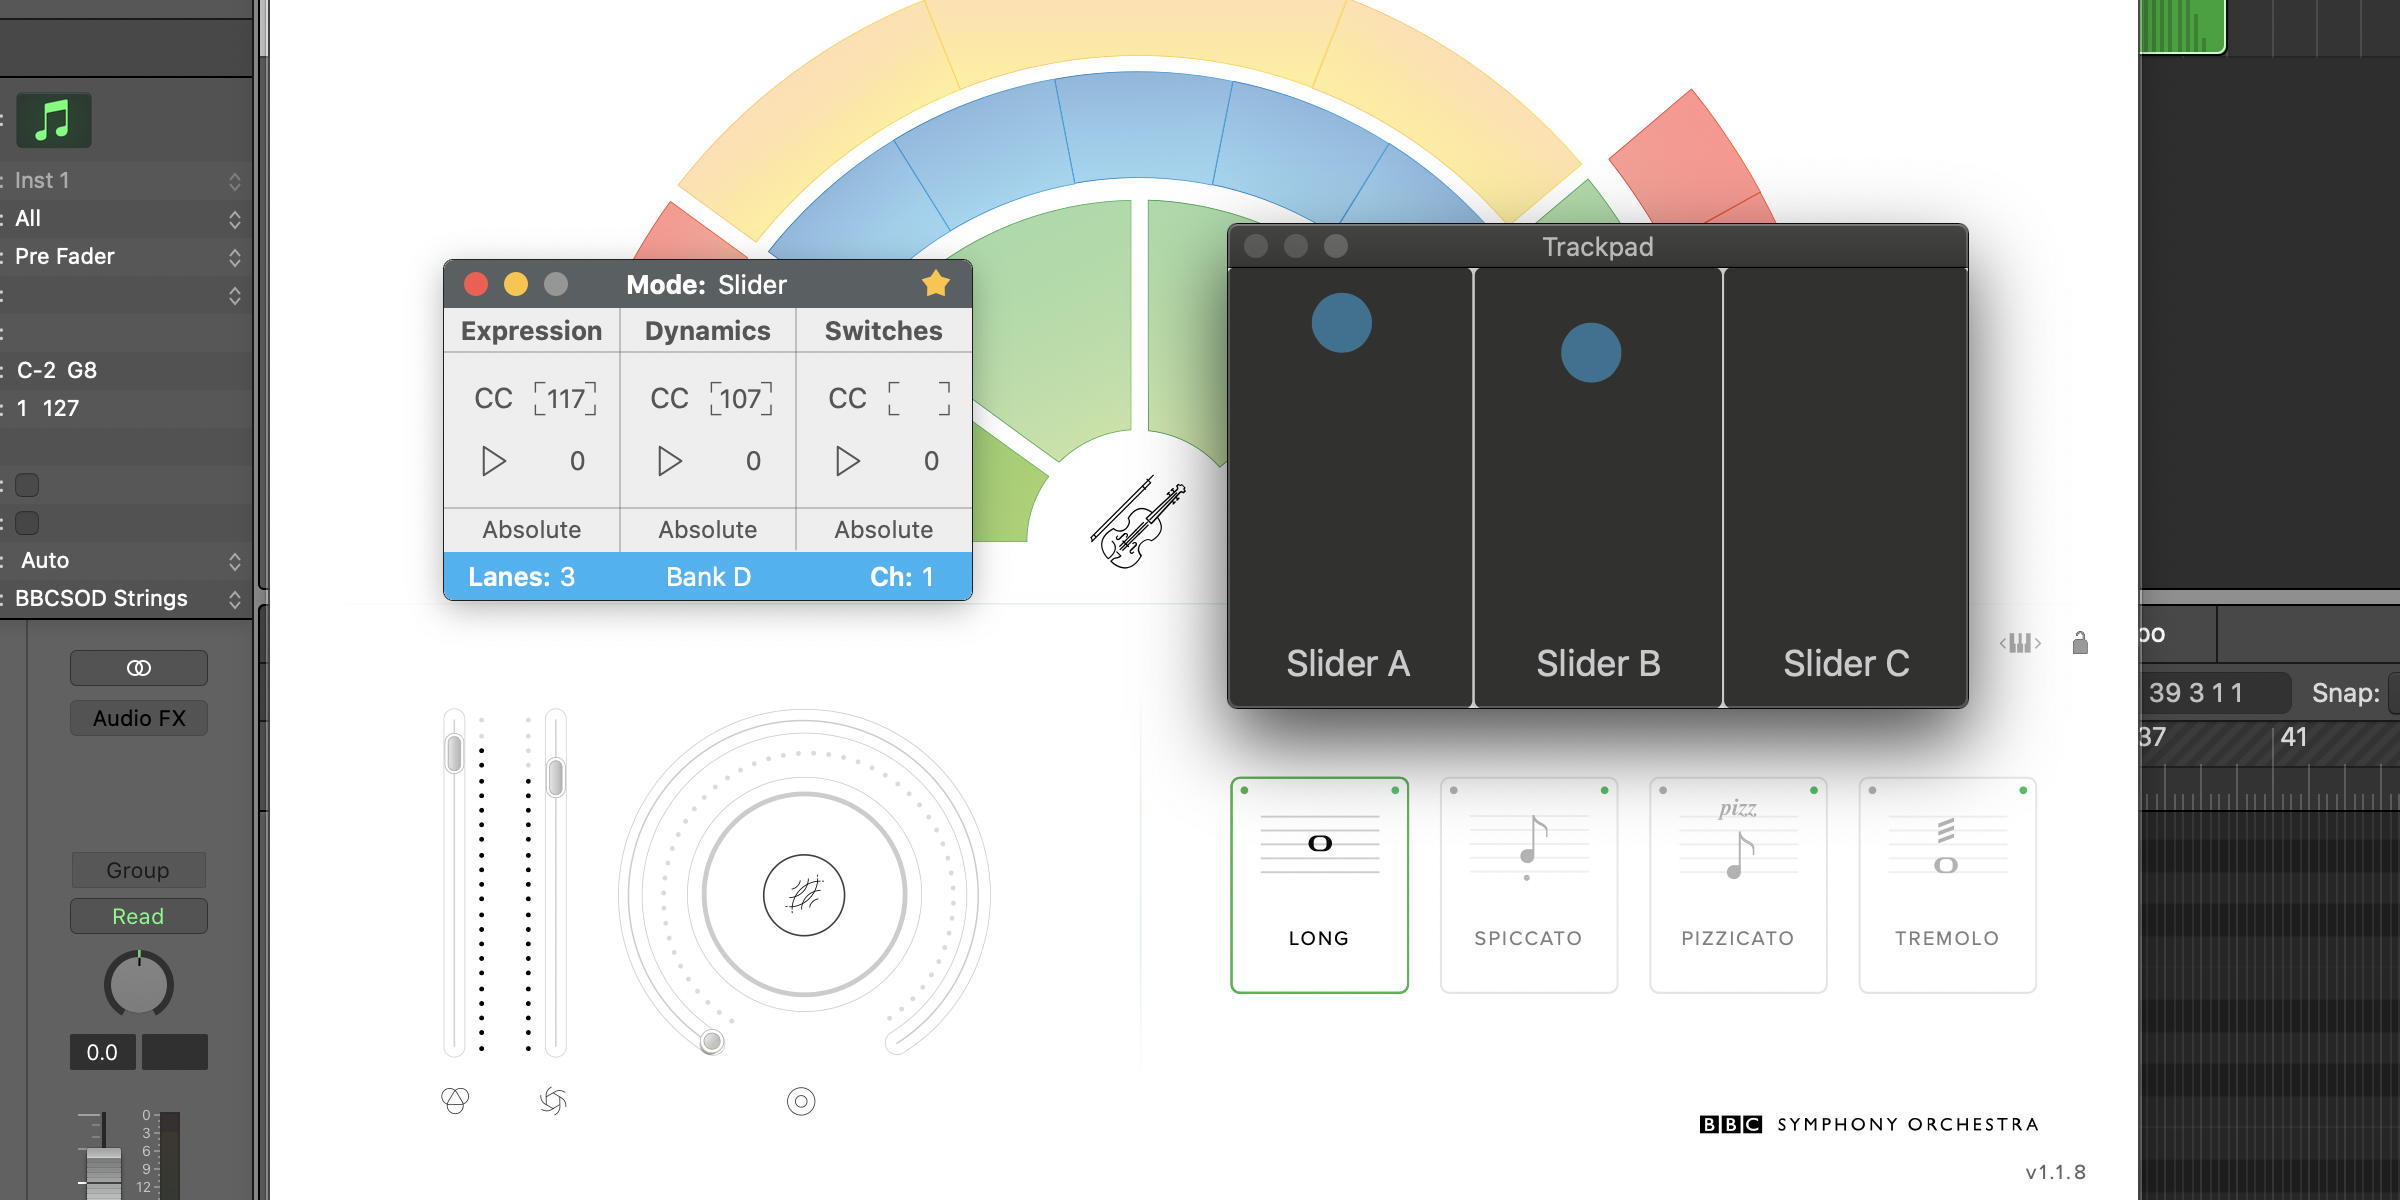
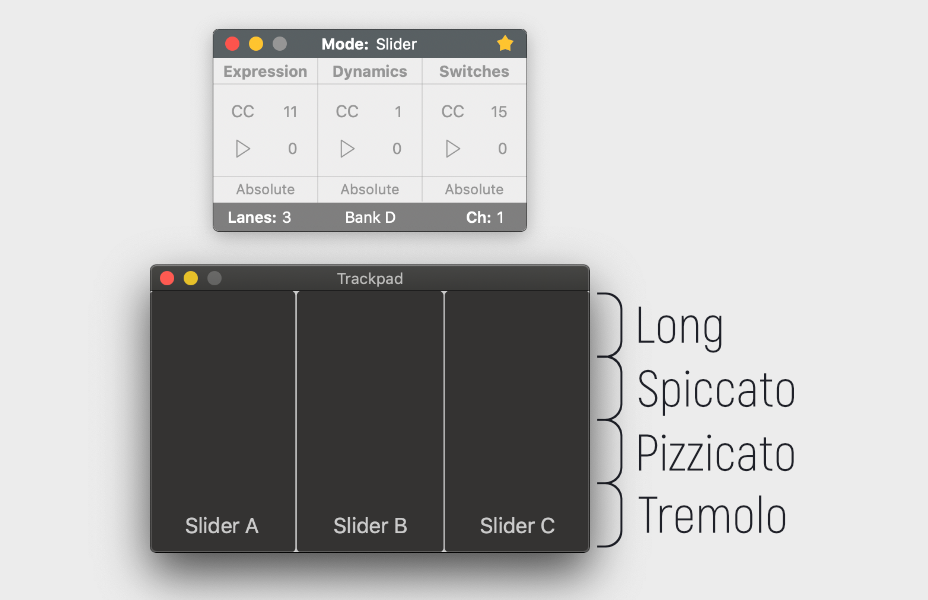
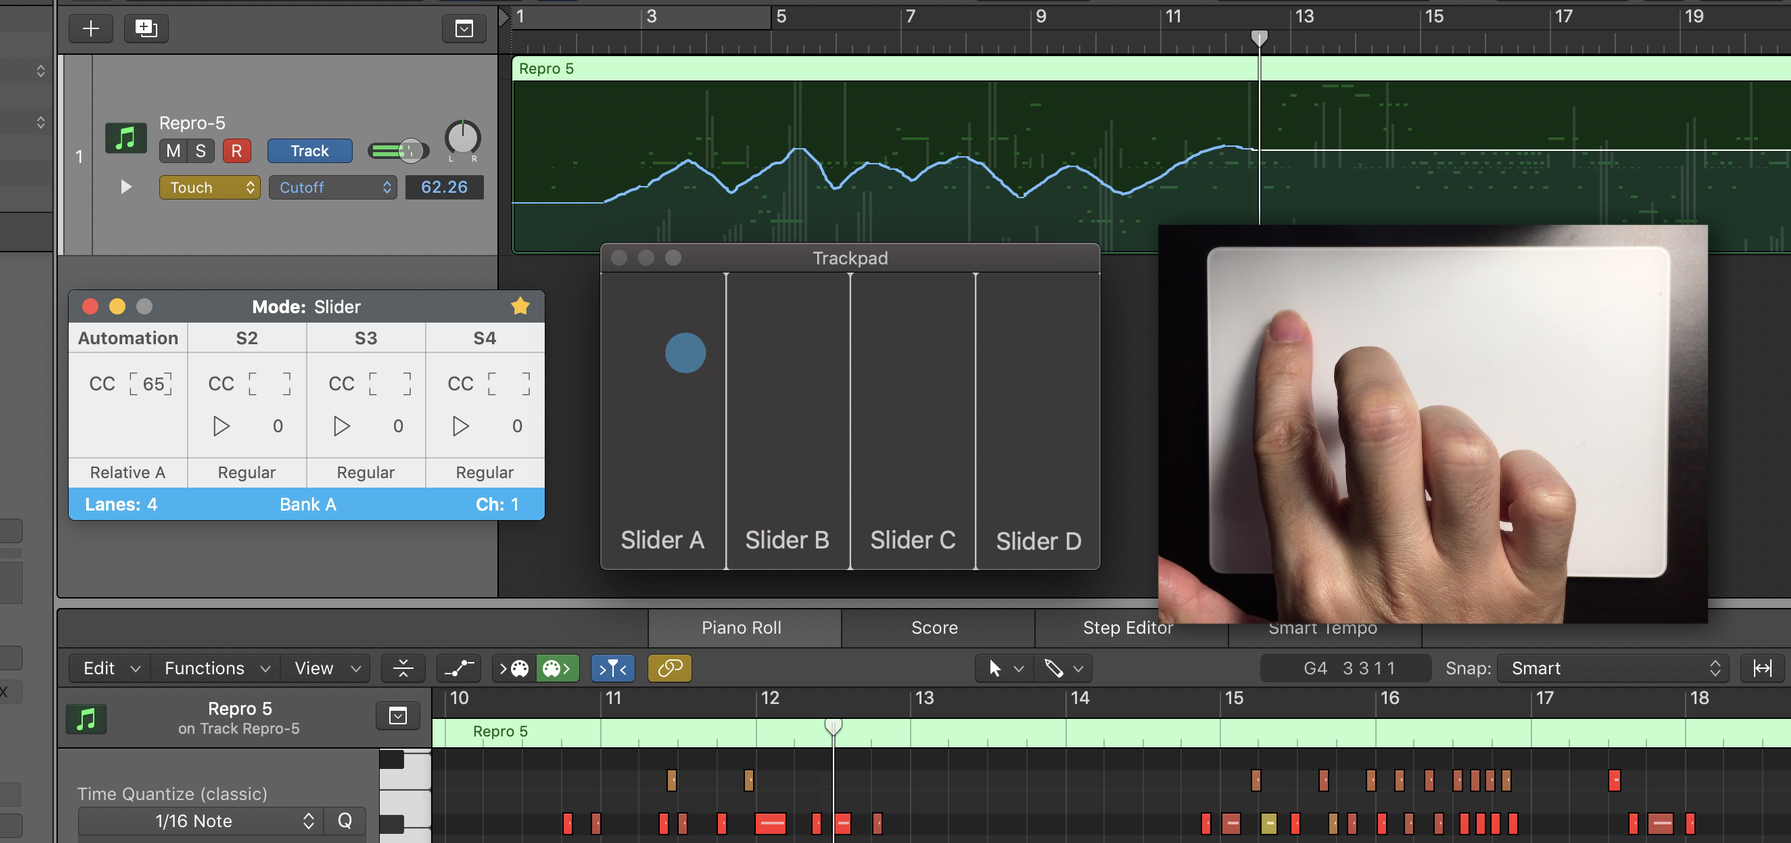
I set AudioSwift in Slider Mode to three sliders and changed the controller formats to Absolute. The first two send CC#11 and CC#1 for Expression and Dynamics. The third slider sends CC#15 and depending on where I touch the finger vertically, it will switch a specific articulation in the plugin.
AudioSwift Console & Trackpad
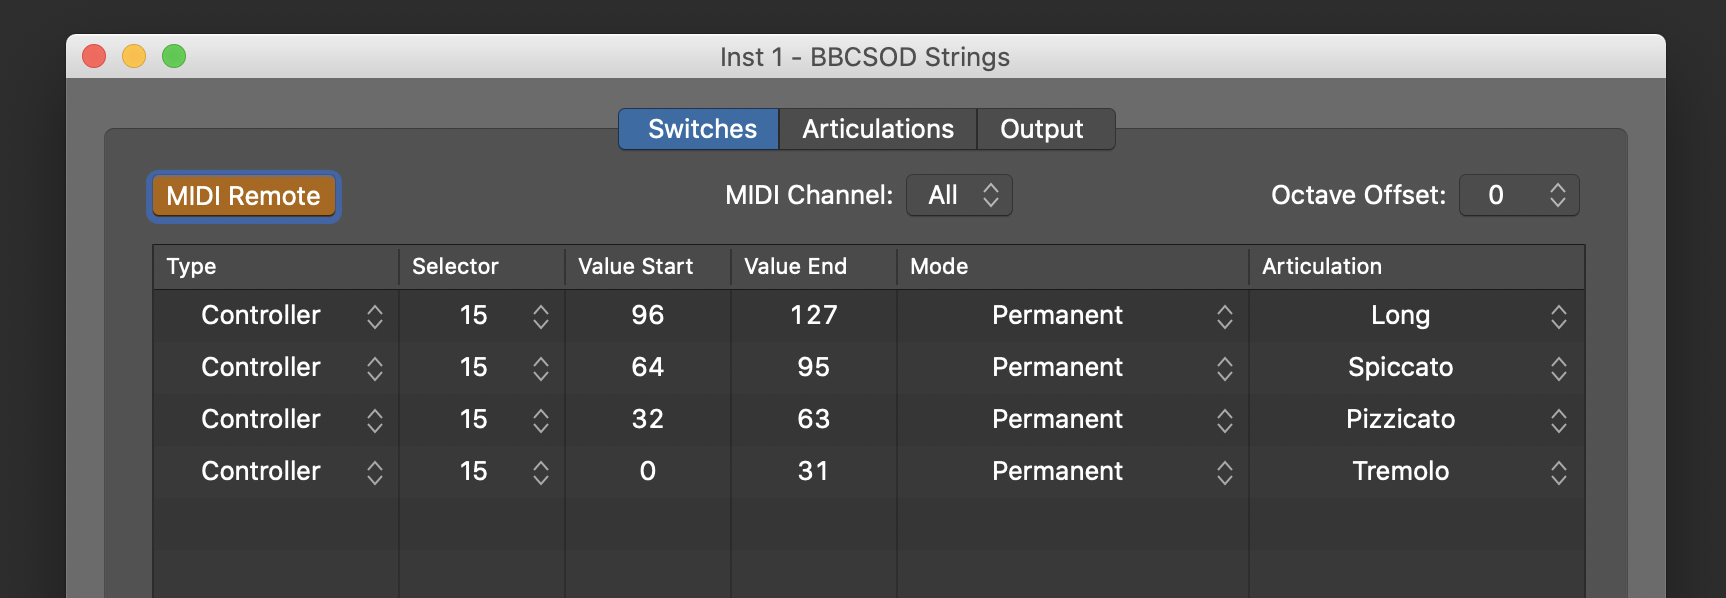
Since this library only accepts MIDI notes for key switching, we will use the Articulation Sets feature in Logic Pro to make it work. I set up four articulation zones for the slider. Each articulation will be triggered if it receives a CC#15 value that is inside the range specified in the articulation set. For example, with all strings instruments, the Long technique will be triggered with any CC#15 value from 96 to 127, Spiccato from 64 to 95 and so on. Check out the video demo below.
Logic Pro X Articulation Set for Strings
If you have the BBC Symphony Orchestra Discover and want to try this articulation sets for yourself, you can download the files from here. There are two different folders in the zip file, one using regular MIDI notes for key switching with the Trigger Mode and the other using CC for the Slider Mode. To save it, open Finder, press CMD + SHIFT + G, copy/paste this location ~/Music/Audio Music Apps/Articulation Settings and click Go. Copy the folder here and restart Logic Pro.
Logic Pro has a feature called Automation Quick Access that allows a single MIDI slider or knob to be mapped automatically to any automation parameter of a track. In the next video, I show you how to set up this feature with AudioSwift in Slider Mode, and have a handy virtual slider on the trackpad for any automation task in Logic Pro.
Learn how to use your trackpad as a photo editing tool on macOS with AudioSwift and MIDI2LR.
Imagine these two scenarios — you’re a photographer that travels a lot, working with a Macbook and edting photos in Adobe Lightroom. Or you’re in your desktop computer and need to retouch hundreds of pictures from your last session, because the client wants them today. Time is money and you want to manage it well.
What if you could speed up your workflow in Lightroom without constantly reaching out the mouse pointer to change settings like exposure or contrast? Why not start using the Macbook’s trackpad or a Magic Trackpad in a different and better way?
Introducing AudioSwift
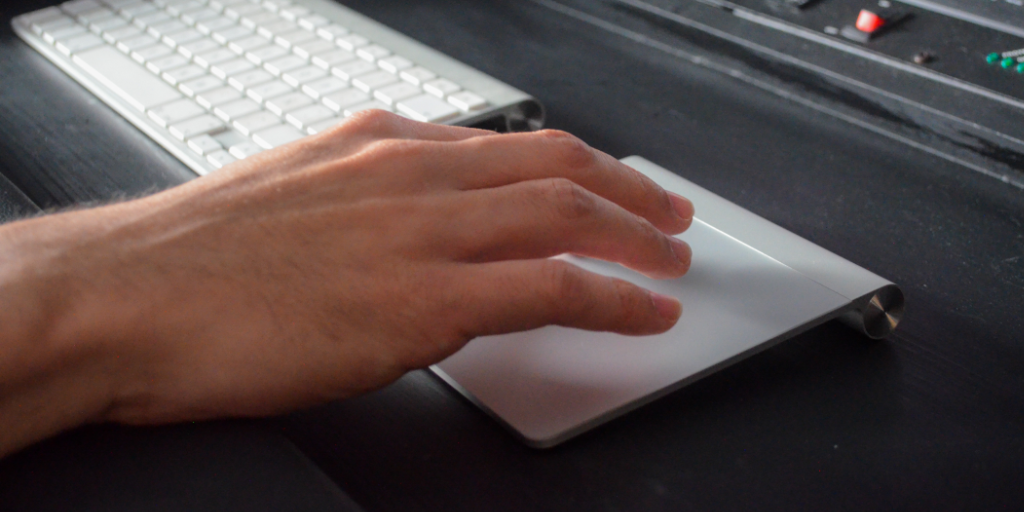
Magic Trackpad 2
OK — I confess I’m not a photographer and before I thought about writing this article, all I knew about photography was the same as any other mortal: take a picture with a phone, go to Instagram, apply a filter, and imagine I’m an artist. However, I had a similar situation to the scenarios described above when working on music production. I needed a tool to create and improve my workflow on location and in my home studio, so I developed AudioSwift.
AudioSwift for macOS is an app that lets you use a trackpad as a MIDI controller. In music production, MIDI controllers are devices widely used to make music and change parameters on screen, by sending commands known as MIDI mesages. With AudioSwift, a trackpad can send these same commands by sliding the fingers over its surface, making it easier for a user to interact with the software’s graphic interface.
I was looking around to see if this concept could also work in different applications other than music creation, like photo editing for example. The challenge was to know if a photo editing app could read MIDI messages and work with AudioSwift properly. That’s when I found out about MIDI2LR.
MIDI2LR Plugin
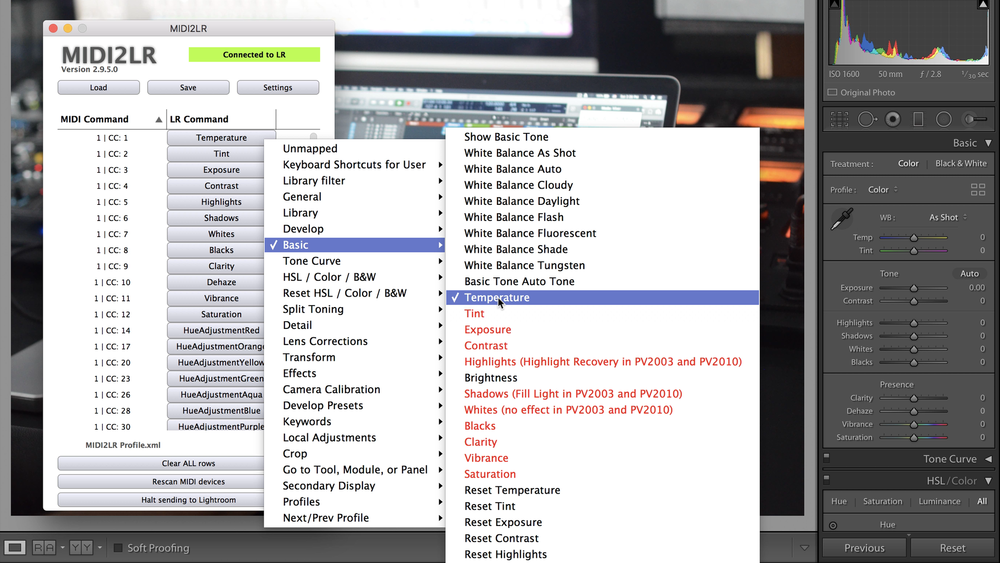
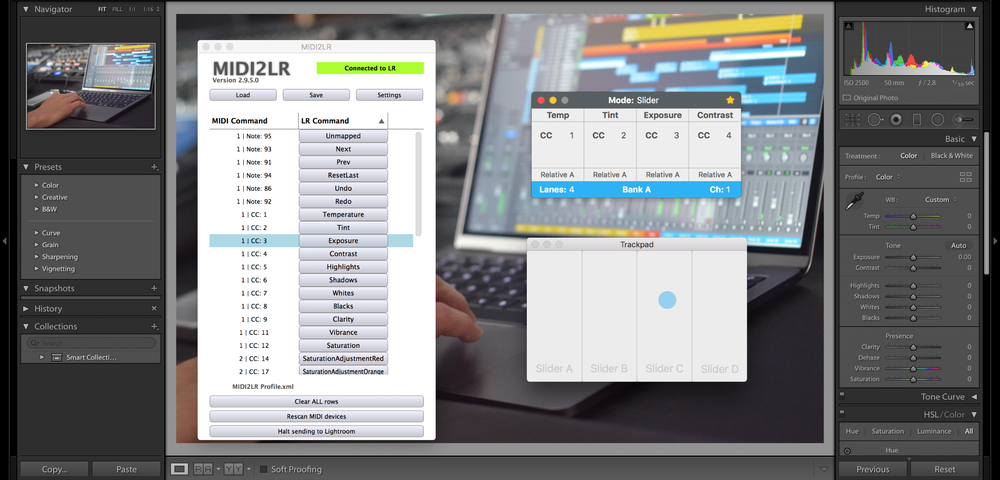
Lightroom Commands in MIDI2LR
Many photographers are using MIDI controllers to tweak their photos in Lightroom. It works by installing a free plugin called MIDI2LR, that translates MIDI messages into Lightroom commands. The user moves a knob or fader to control a Lightroom parameter without reaching out the mouse pointer, making it easier and faster to edit a bunch of photos.
So, why not use a trackpad instead of getting another physical device? A Macbook has one built in, and some photographers already work with Magic Trackpads in their desktop computers. I tried out MIDI2LR with AudioSwift and the results were fantastic — the trackpad can now tweak the same parameters in Lightroom like a MIDI controller does, without clicking and dragging each setting on screen.
How Does It Work?
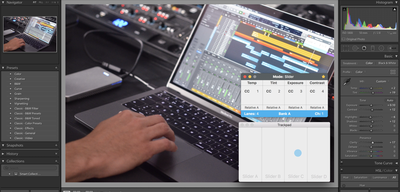
AudioSwift with MIDI2LR in Lightroom
You call AudioSwift by tapping the trackpad with a four or five fingers tap. This opens a console window, freezing the mouse pointer temporarily and taking control of the keyboard. AudioSwift devides the trackpad into 4 virtual sliders, and each one controls a Lightroom setting. The console window shows which Lightroom settings will be controlled. You start touching the trackpad’s surface up or down and the corresponding parameter will move instantly. Press the period or comma keys to jump to the next bank of 4 virtual sliders. After you finish changing the settings, press the escape key and AudioSwift will be turned off. The mouse pointer is then released.
I was able to control 36 different settings in the Lightroom Develop Module, using just a trackpad. At MIDI2LR you set up each virtual slider to a specific Lightroom command. There’s a lot of options to choose from. Once it’s configured properly, it’s very precise and intuitive.
Give It A Try!
I made a video tutorial showing step by step how to configure AudioSwift and MIDI2LR. It includes preset files so you can start working right away. I hope this information is useful to you and it really improves your workflow. If you have any question, you can contact me in the comment section below, via email, or by Twitter and Facebook.
MIDI2LR is free to download and the developer RSJaffe ask for donations. I’m not affiliated, but I strongly encourage you to donate, so the developer can continue supporting this great plugin in the future.
AudioSwift for macOS is an app that lets you use a trackpad as a MIDI controller.
Designed for music producers and photographers, with AudioSwift you can control virtual instruments in your digital audio workstation or edit photos faster in Adobe Lightroom, all by just using simple touch gestures over the trackpad.
Here is how it works — call AudioSwift by using a four or five fingers tap. A console window appears on screen taking control of the mouse pointer and keyboard. Start touching the trackpad to control a parameter and when you finish, hit the escape key to turn AudioSwift off.
Five Controller Modes
AudioSwift comes in five controller modes depending on what you want to control:
Slider — divides the trackpad into 4 virtual sliders that send either CC or Pitch Bend MIDI messages.
XY — control many parameters at the same time using one, two or three fingers.
Mixer — designed to speed up your mixing workflow. Control two faders at the same time, panning, sends, use the trackpad as a jog wheel, and write automation.
Trigger — tap your fingers over the trackpad to make beats or launch audio clips.
Scale — play notes in a selected key.
Switch between controllers easily by just pressing keyboard shortcuts, or by using the Touch Bar in compatible Macbooks. Trackpads with Force Touch support can be used to send after touch MIDI messages, also known as channel pressure.
What’s new in Version 2?
AudioSwift in Adobe Lightroom
New Slider Mode with 12 configurable virtual sliders.
New XY Mode design with 5 views and 30 configurable controllers.