Learn how to control Live macros with the trackpad and AudioSwift in Slider Mode.
In the last blog post, I talked about using Automation Quick Access in Logic Pro for mapping one single slider in AudioSwift to multiple parameters on a track. Now for Ableton Live, I’ll show you a way to automatically assign the eight macros knobs on a rack to virtual sliders on the trackpad. We’re going to use a feature called Instant Mappings, which consists on changing a remote script text file with the control change (CC) numbers of the sliders, so Live can read it and make the connection instantly when you select the rack. You can use this for writing automation or quickly change the settings of an instrument/effects rack while you’re looking for the right sound. Let’s start…
AudioSwift in Slider Mode
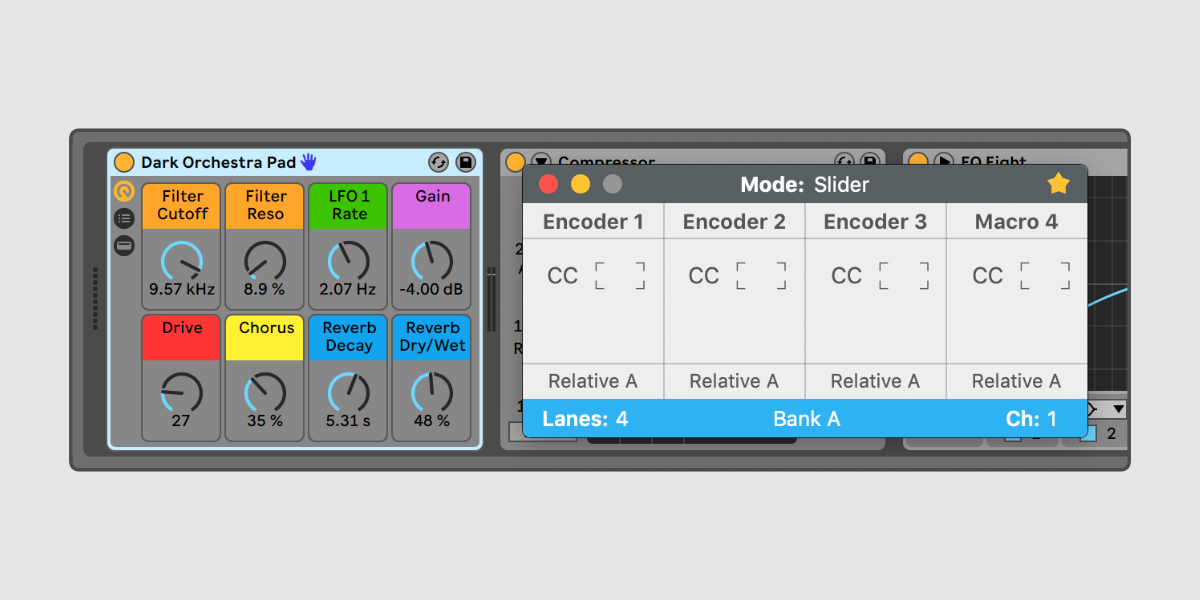
Go to the AudioSwift Console and change the controller mode to Slider. For this tutorial, I’m going to use Bank A for the first four sliders, Bank B for the other four and MIDI channel 1. I changed the labels from Encoder 1 to Encoder 8, and assigned a CC number to each one from 20 to 27 (choose CC numbers that aren’t used anywhere in your project). I also changed the format of all sliders to Relative A. This is how it looks:

The UserConfiguration.txt File
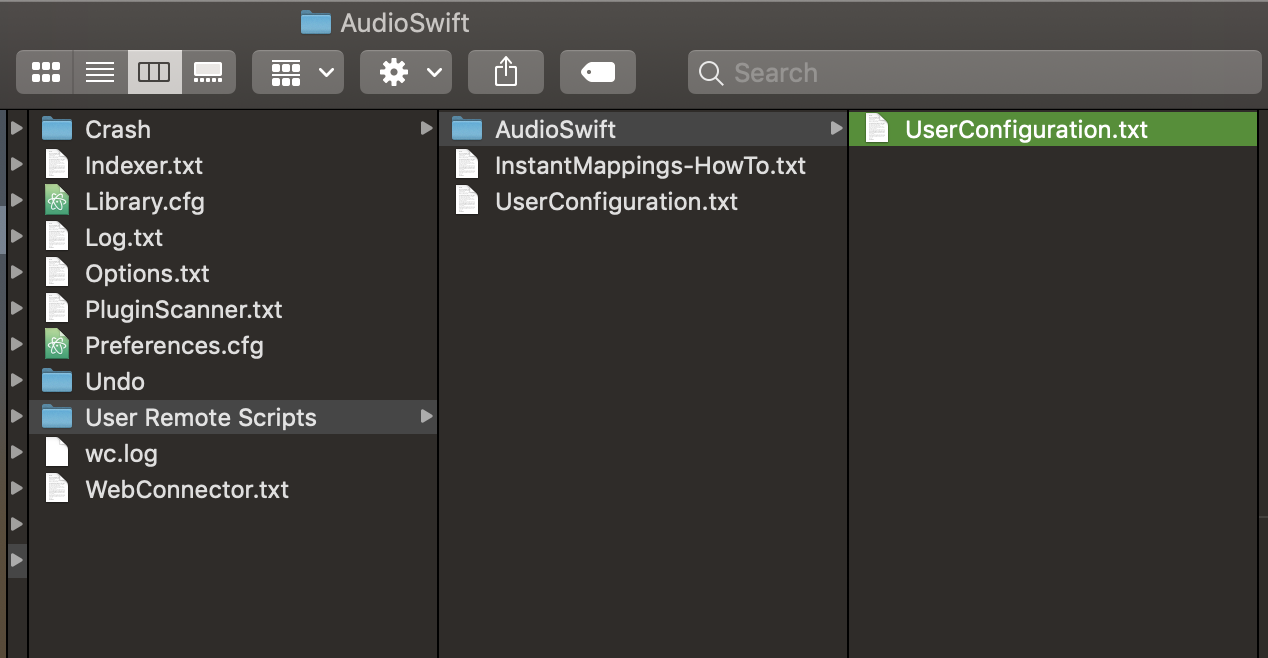
We are going to look for the UserConfiguration.txt file and modify the remote script. With Ableton Live closed, go to Finder and press CMD+SHIFT+G. In Go To the Folder, paste this address ~/Library/Preferences/Ableton and click Go. Look for your current Live version and then click the User Remote Scripts folder. Create a new folder called AudioSwift. Copy the file UserConfiguration.txt and paste it inside the AudioSwift folder or download the one I made for this tutorial.
Open the text file to make the changes. You’re going to see a lot of lines but don’t worry, it’s really easy to get through it. All lines that have # are comments. The text is divided into sections and we’re going to check only two. The first one at the top is [Globals]. Look for the line GlobalChannel. By default it’s set to 0 which is MIDI channel 1 (it goes from 0 to 15), so we are OK here, since the AudioSwift Console is also using channel 1.
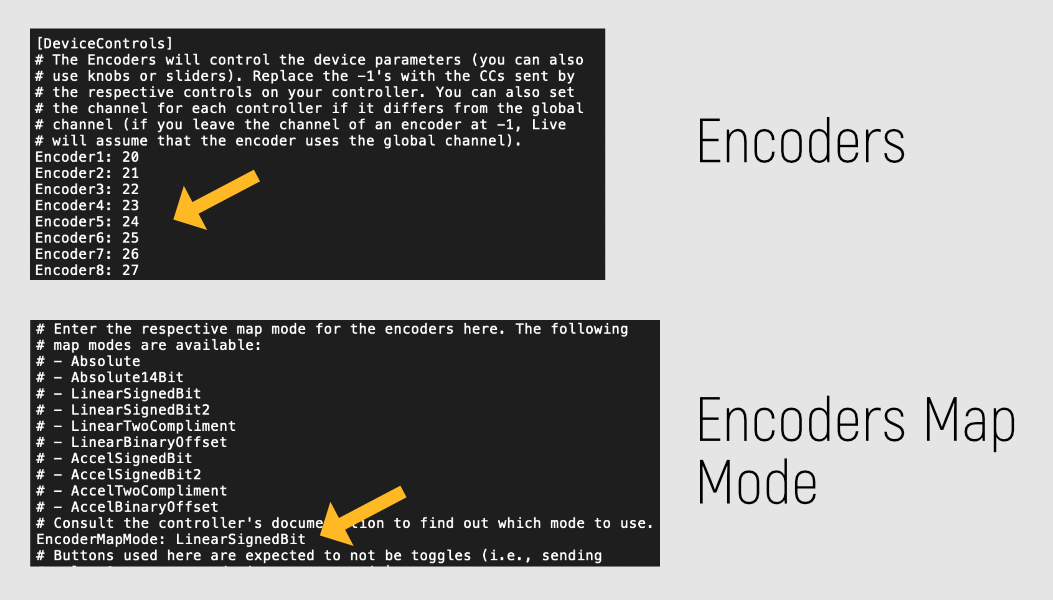
The second section is [Device Controls]. Here we type the same CC numbers used in the AudioSwift Console to the eight encoders. Some more lines below, change the EncoderMapMode to LinearSignedBit. Save the file and close the window.
Ableton Live Configuration
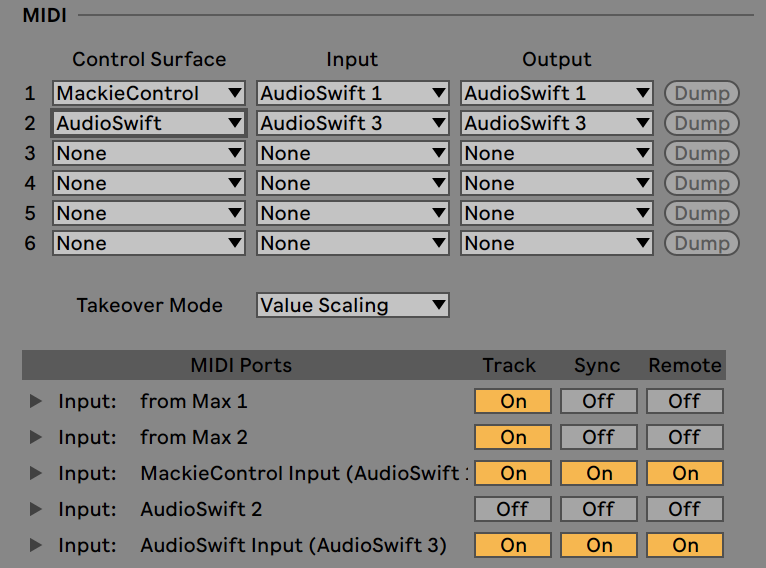
Open Live and go to Preferences > Link MIDI. Make sure AudioSwift 3 input port is turned on in the MIDI Ports section. Under Control Surface, choose AudioSwift and select AudioSwift 3 as Input and Output. Close the window.
Now let’s test it. Select the instrument or effect rack. You’ll see a blue hand icon next to the title of the device, meaning that it’s been controlled by AudioSwift. Turn on AudioSwift with a four or five finger tap and start moving the sliders. To change between banks A and B use the key shortcuts Z, X, comma or period. Press Escape when you finish.
More tips
I showed you how to use AudioSwift with macro controls, but you can also select any Live device and AudioSwift can handle the first 8 parameters. What parameters will control depends on the device itself and your memory to remember. For example, the first two sliders can control the frequency cutoff and resonance in the Auto Filter device. In Live’s Compressor, the first four handle the threshold, ratio, attack and release in that order.
Maybe you want to use one of the slider to map something different on the fly using CMD+M on Ableton Live. You can use the sliders in Bank C of AudioSwift for this, or since we used MIDI channel 1 for the remote script with AudioSwift, change to another channel in the AudioSwift Console with key shortcuts Right or Left arrows.
If you’re looking to control volume and pan, I recommend using AudioSwift in Mixer Mode. It’s specially designed for this purpose. Learn how to use it with Ableton Live in our tutorials section. Once it’s configured, switch between Mixer and Slider Mode with key shortcuts 1 and 5.
We used relative MIDI for this particular configuration. If you feel the sensitivity of the slider is not what are you looking for, we can set it up to use absolute MIDI. Change the EncoderMapMode in the UserConfiguration.txt file to Absolute instead of LinearSignedBit, and change each slider in AudioSwift to Regular format. Then go to Ableton > Preferences > Link MIDI and try one of the Takeover Modes: None, Pick up or Value Scaling. Also, try another sensitivity for the controllers in AudioSwift > Preferences > Slider & XY tab.
For really complex automation, try assigning the same CC numbers of the Slider Mode to one or two XY pads in the XY Mode View 2, and experiment controlling up to four macros at the same time in all directions. Use the Return to Default setting in the AudioSwift Console to return to the original position of the knobs.
Be bold and have fun!
MORE ABLETON LIVE TOOLS