In this article, I’ll show you two different ways to use the trackpad with AudioSwift for articulation switching in an orchestral library. For this tutorial, I’ll be working with the recently released BBC Symphony Orchestra Discover by Spitfire Audio, but you can use any other virtual instrument that has articulations.
The first method works on any DAW; it uses the Trigger Mode to send MIDI notes for key switching. The second method is by sending control change messages (CC) with the Slider Mode and works for Logic Pro X users via Articulation Sets. This way you can have two sliders for controlling expression (CC#11) and dynamics (CC#1), and a third one for switching articulations.
Triggering MIDI notes
The most common way to change articulations in a virtual instrument is triggering a MIDI Note On message. Each articulation is assigned to a MIDI note and they usually start in the lowest range of the keyboard, from C-2 and up. If you have as small keyboard, this range isn’t easy to access and if there are too many articulations for the instrument, it becomes a problem to remember the MIDI note that triggers the one you want.
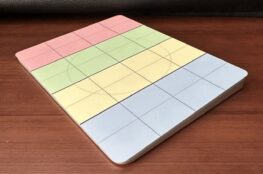
With AudioSwift in Trigger Mode, the trackpad can be divided into different pads, each one with its MIDI note and a label to identify the articulation. In the library I’m using, there are two to four different techniques for each group of instruments. I divided the trackpad into 8 pads, changed the type to Drums and used two different banks to fill all the articulations needed.

In Bank A, the bottom pads trigger the strings articulations which are the same for the violins, violas, cellos and double basses (except the basses don’t have tremolo). The top row only triggers two articulations for the brasses and woodwinds. In Bank B, I put the rest of articulations for the percussion instruments of the library. Use the keyboard shortcuts Z, X, comma and period to change between banks. Save the AudioSwift settings in Preferences > General tab for later recall.
If your orchestral library uses control change messages instead of MIDI notes for articulation switching, you can still use the Trigger Mode if you’re on Logic Pro X or Cubase. Logic Pro has the Articulation Sets and Cubase the Expression Maps, which are two features for receiving any MIDI message (a MIDI Note On in our case) and sending control change messages that the sample library can respond to. Check out each DAW or library user guide to set it up.
CC messages with the Slider Mode & Logic Pro X
Orchestra libraries accept two or three CC messages to control the sounds for expressiveness using sliders. With AudioSwift in Slider Mode, we can use a third or fourth slider in AudioSwift to trigger articulations right from the trackpad.
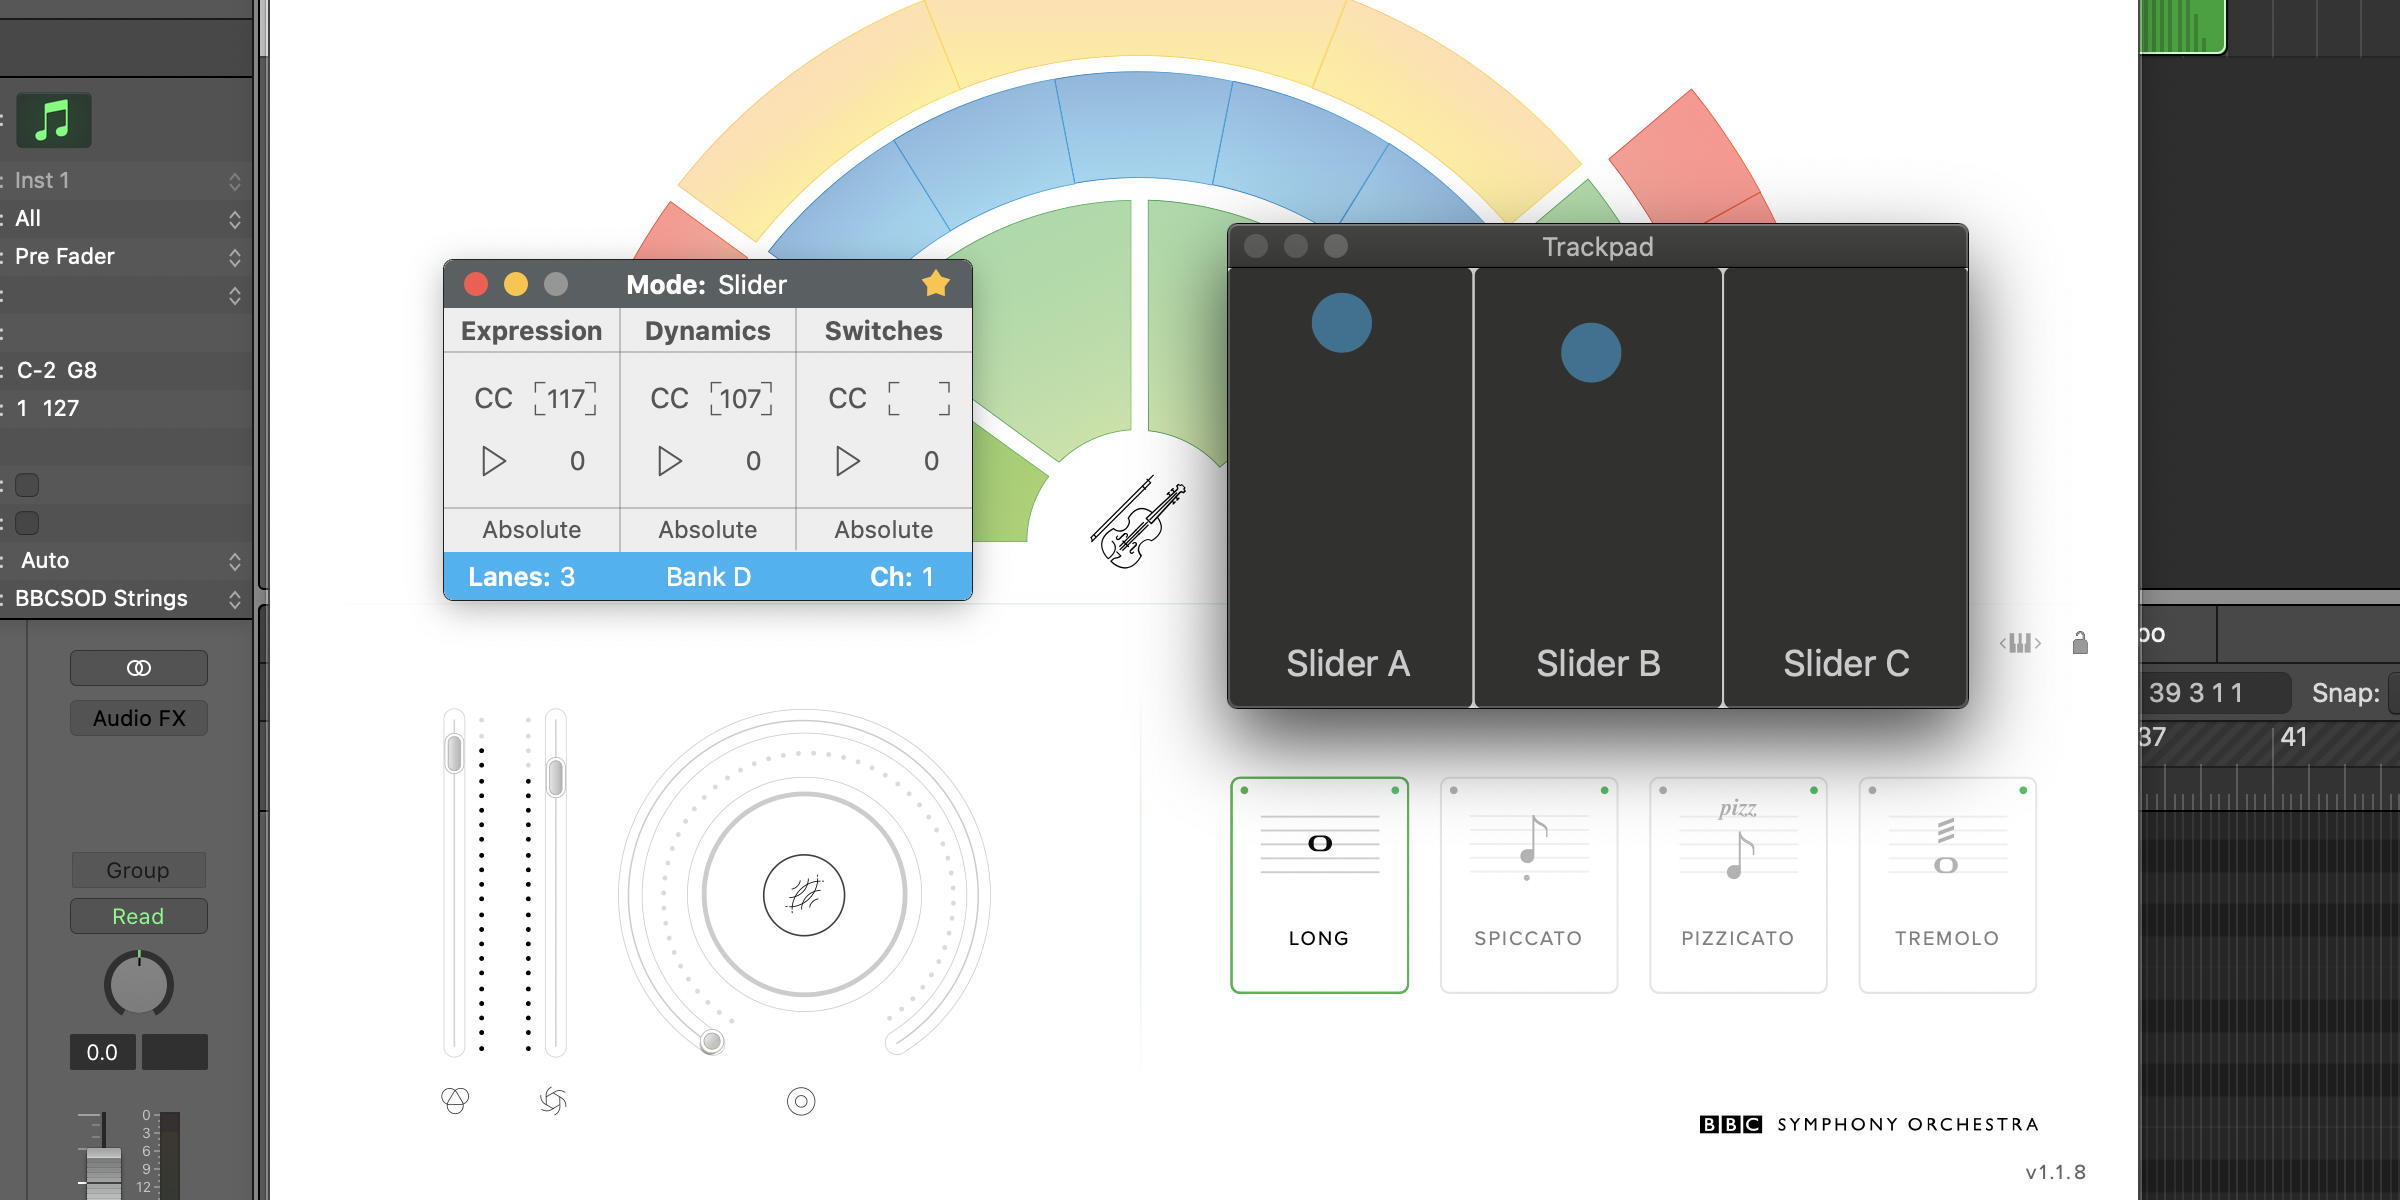
I set AudioSwift in Slider Mode to three sliders and changed the controller formats to Absolute. The first two send CC#11 and CC#1 for Expression and Dynamics. The third slider sends CC#15 and depending on where I touch the finger vertically, it will switch a specific articulation in the plugin.
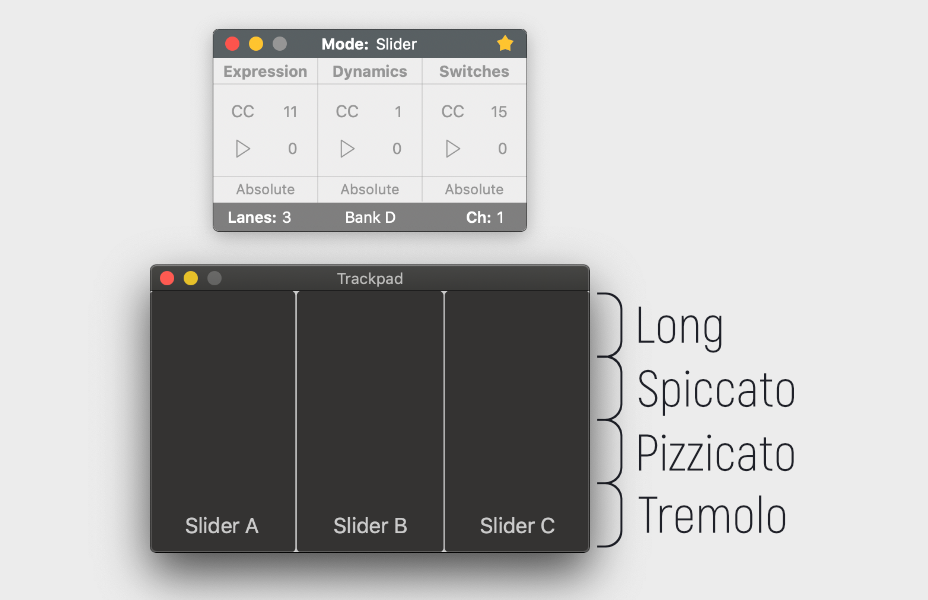
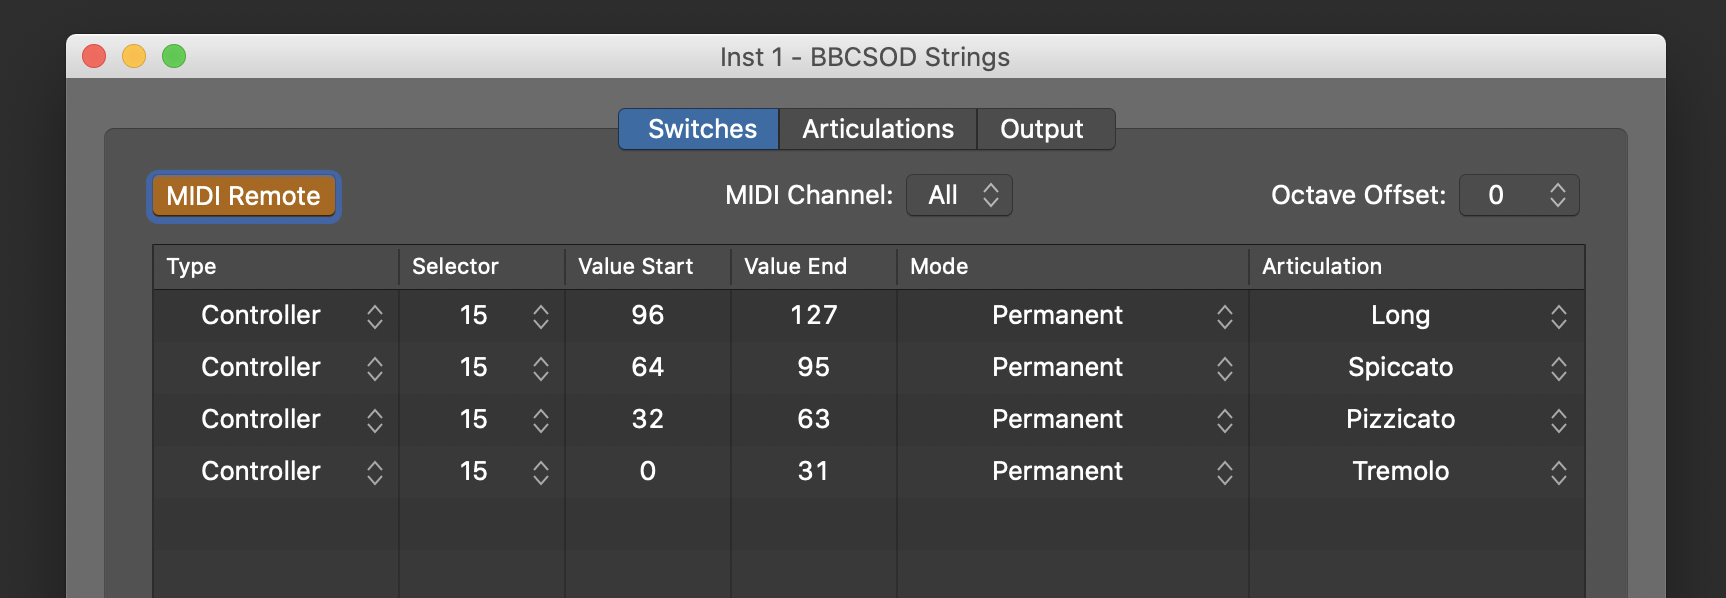
Since this library only accepts MIDI notes for key switching, we will use the Articulation Sets feature in Logic Pro to make it work. I set up four articulation zones for the slider. Each articulation will be triggered if it receives a CC#15 value that is inside the range specified in the articulation set. For example, with all strings instruments, the Long technique will be triggered with any CC#15 value from 96 to 127, Spiccato from 64 to 95 and so on. Check out the video demo below.
If you have the BBC Symphony Orchestra Discover and want to try this articulation sets for yourself, you can download the files from here. There are two different folders in the zip file, one using regular MIDI notes for key switching with the Trigger Mode and the other using CC for the Slider Mode. To save it, open Finder, press CMD + SHIFT + G, copy/paste this location ~/Music/Audio Music Apps/Articulation Settings and click Go. Copy the folder here and restart Logic Pro.