Controlling XY Pads in Krotos Studio with a Trackpad

UPDATED – NOVEMBER 23, 2024. For this tutorial, I’m using Krotos Studio version 2.1.2 and AudioSwift 2.3.8 Beta for macOS.

Krotos Studio is a sound FX plugin that comes with two XY pads to control the sound design. We can use a trackpad with AudioSwift for macOS to move both XY pads in real time. In this tutorial, we’re going to explain two methods to map Krotos Studio parameters to the trackpad.

Method 1 – Krotos Studio MIDI CC Assignments

The latest Krotos Studio version 2.1.2 added MIDI CC assignments capabilities for controls and XY pads inside the software. We can map the X and Y axes to AudioSwift CC’s using Krotos Studio MIDI Learn feature. For this first method we’re going to use Pro Tools as an example but it should work with any DAW.

Watch Demo 1 with Pro Tools

MIDI Mapping Process with AudioSwift

Since we are going to use AudioSwift in XY Mode, make sure the AudioSwift port 3 is enabled in the DAW. For Pro Tools, check Pro Tools > Setup > MIDI > MIDI Input Devices. Then, create an Instrument track and insert the Krotos Studio plugin. Make sure to click the arm record button on the track in order to receive MIDI messages from the trackpad.

AudioSwift port 3 and track record button enabled.

In the AudioSwift Console window, select XY Mode and View 2 to divide the trackpad into 2 XY pads. Choose the CC numbers you want to use. For the Left and Right XY pads, we’re only going to use the XY axes and not the switch buttons. Set both formats to Regular.

AudioSwift Console Window

We need to map each parameter one at a time. Only click the left X button in the AudioSwift Console to enable it and disable all others axes. In Krotos Studio, right click the left XY pad dot and click MIDI Learn X Axis CC#. In this example, we are in the preset Ambiences – City in Krotos Studio.

MIDI Learn feature in Krotos Studio

Krotos Studio is now waiting to receive a MIDI message from the trackpad. Turn on AudioSwift with a four/five finger tap gesture on the trackpad and move your finger over the left XY pad in an horizontal way. Turn off AudioSwift by pressing the Escape key. The X axis in Krotos Studio should now be mapped to the CC number for the left X axis of the trackpad. In this example is CC10.

To map the Y axis, first disable the left X axis in the AudioSwift Console window and enable the left Y axis button. This is to make sure Krotos Studio will only receive the Y axis message from the trackpad. Right click again the left XY pad dot in Krotos Studio and now select MIDI Learn Y Axis CC#. Turn on AudioSwift with a four/five finger tap gesture and move the finger over the left XY pad in a vertical way. Turn off AudioSwift by pressing the Escape key. Both axes should be enabled to the correspondent CC numbers. Just right click the dot again to double check the mapping, then repeat the steps again to map the right XY pad in Krotos Studio and AudioSwift.

X and Y axes mapped to CC10 and CC11.

Test the Trackpad

Now Krotos Studio is ready to be tested with the trackpad. With the track selected and with the arm record button enabled, go to the AudioSwift Console and enable the left XY buttons and the right XY buttons. Click the start button in Krotos Studio to start recording. Turn on AudioSwift with a four/five finger tap gesture and start moving the left XY pad on the trackpad and then the right XY pad.

Tips for Method 1

The MIDI mappings can be saved if you save the preset as a user preset inside Krotos Studio. Next time you load the user preset, its MIDI mappings will be there. The MIDI mappings will work only for that particular sound you chose. If you change to another factory preset from either the same category of sounds or other, all the mappings that were in the previous preset will be deleted.

The buttons for start recording the sounds can’t be MIDI mapped from inside Krotos Studio. They don’t appear available for MIDI Learn. To start a sound you’ll need to press a MIDI note if you have a MIDI keyboard available and keep pressing the key (or use a sustain pedal). Release the key, and the recording will stop.

If you don’t have a MIDI keyboard available, you can use the MIDI Keys available in the latest AudioSwift Beta Version. When AudioSwift is active, there’s a MIDI keys feature using the computer keyboard (just like the ones that come built in DAWs). To activate it, click the MIDI Keys icon in the top left corner of the AudioSwift Console Window or press CMD + K. To sustain the note so you can use both hands on the trackpad, play the note and then press SHIFT + Tab. This will lock the sustain. To stop the note press the Tab key again to release the sustain.

MIDI Keys Icon in the AudioSwift Console Window

Method 2 – DAW MIDI Learn Function

For this method we’re going to use the MIDI Learn feature built in the DAW to do all the mapping. This method works with any DAW that has MIDI assignments features. For this example, we’re going to use Ableton Live.

Watch Demo 2 with Ableton Live

Selecting Krotos Studio Parameters in Ableton Live

Insert a VST or AU version of Krotos Studio in a track and select one of the presets in a category. In this example, we chose the preset Ambiences – City. We need to be able to see the parameters of Krotos Studio in Ableton Live in order to map them. The parameters names can vary between presets, and that’s why it’s important to first choose the preset before continuing with the mapping. Go to the plugin device, click the top left triangle to expand the device and click Configure.

Krotos Studio Device in Ableton Live

IMPORTANT: don’t change between presets in Krotos Studio while the Configure button is enabled. Now click the left XY pad in Krotos Studio and the XY parameters will appear with a green color under the Configure button in the Ableton Live device (labeled XYPad_0 posX and posY in this example). Then, click the right XY pad to add those parameters and also click the Start button. Disable the Configure button. At the end there should be 5 parameters added like this:

Parameters added to the Device list


MIDI Mapping Process with AudioSwift

Since we are going to use AudioSwift in XY Mode, make sure the AudioSwift port 3 is enabled in Ableton Live > Settings > Link, Tempo & MIDI > Remote column.

Ableton Live MIDI Settings

In the AudioSwift Console window, select XY Mode and View 2 to divide the trackpad into 2 XY pads. Choose the CC numbers you want to use. For the Left XY pad, we’ll use the XY axes and the switch button. The switch button is for starting the sound when the finger touches the trackpad and turning it off when it’s lifted. For the right XY pad, we’ll only use the XY axes. Set both formats to Regular.

AudioSwift Console in XY Mode – View 2

We need to map each parameter one at a time. Only click the left X button in the AudioSwift Console to enable it. In Ableton Live, press CMD + M to enable the MIDI Map switch. The parameters will turn purple and they are waiting to receive a MIDI message from the trackpad. Look for the first X parameter (labeled XYPad_0 posX) under the Configure button and click it. Turn on AudioSwift with a four/five finger tap gesture on the trackpad and move your finger over the left XY pad in an horizontal way. Turn off AudioSwift by pressing the Escape key. The X parameter in the device should now be mapped to the CC number for the left X axis. In this example is CC10 on MIDI channel 1 (labeled 1/10 in the image below).

CC10 on MIDI channel 1

To map the Y axis, first disable the left X axis in the AudioSwift Console window and enable the left Y axis button. This is to make sure Ableton Live will only receive the Y axis message from the trackpad. Click the Y parameter in the device (labeled XYPad_0 posY). Turn on AudioSwift with a four/five finger tap gesture and move the finger over the left XY pad in a vertical way. Turn off AudioSwift by pressing the Escape key.

For the Start button in Krotos Studio (labeled Master Autoplay), repeat the same process but this time only enable the switch button of the left XY pad in the AudioSwift Console. Then repeat the steps for the right XY pad. At the end all parameters should be mapped like this.

All parameters mapped

Test the Trackpad

Disable the MIDI Map switch in Ableton Live by pressing again CMD + M. Now Krotos Studio is ready to be tested with the trackpad. With the track selected and with the arm record button enabled, go to the AudioSwift Console and enable the left XY buttons and the switch, and the right XY buttons. Turn on AudioSwift with a four/five finger tap gesture and start moving the left XY pad on the trackpad and then the right XY pad.

Testing the Trackpad with Krotos Studio

Tips for Method 2

Notice that if you lift the left XY pad the sound stops. Maybe you don’t like this behavior with this preset. Just disable the left switch button in the AudioSwift Console and instead, start the sound in Krotos Studio by clicking the Start button.To start a sound you can also press a MIDI note if you have a MIDI keyboard available and keep pressing the key (or use a sustain pedal). Release the key, and the recording will stop.

If you don’t have a MIDI keyboard available, you can use the MIDI Keys available in the latest AudioSwift Beta Version. When AudioSwift is active, there’s a MIDI keys feature using the computer keyboard (just like the one that comes built in DAWs). To activate it, click the MIDI Keys icon in the top left corner of the AudioSwift Console Window or press CMD + K. To sustain the note so you can use both hands on the trackpad, play the note and then press SHIFT + Tab. This will lock the sustain. To stop the note press the Tab key again to release the sustain.

MIDI Keys Icon in the AudioSwift Console Window

If you switch to another preset in Krotos Studio, maybe the XY pads will be switched in position, or the parameters won’t be mapped at all. Some presets have knobs instead of XY pads. In this case, for the new selected preset, you’ll need to repeat the process with the Configure button to add the missing parameters and map them to the AudioSwift Console. You could map them to the same CC numbers, use another MIDI channel, or use another view in the XY mode with different CC numbers.

Some presets (like Whoosh – Hybrid) don’t have a Start button. Instead, the sound is triggered when its XY pad is clicked (parameter labeled onClick). You need to map this parameter to a different CC number in the AudioSwift Console with the switch button. Otherwise if you use the same CC number as Start, the onClick parameter will be triggered but also the Start button of other presets, causing no sound at all. This happened in my tests.

Once you added all parameters, you could save Krotos Studio as a preset inside Ableton Live, so the parameters list will appear again when you load the plugin in a different project. This will save you time. However, this doesn’t save the MIDI mapping (unless you save the project as a template). You’ll need to do the MIDI mapping process again.

Sometimes when doing the MIDI mapping, Ableton Live sets the CC numbers as relative MIDI instead of absolute MIDI. You’ll notice this behavior if you use the trackpad and the parameters jump all over the place. To change this, press again CMD + M and click the parameter. At the bottom right you’ll see the mode. Make sure Absolute is selected. In the AudioSwift Console select between Regular or Absolute format and choose the behavior you prefer for the trackpad MIDI controller.

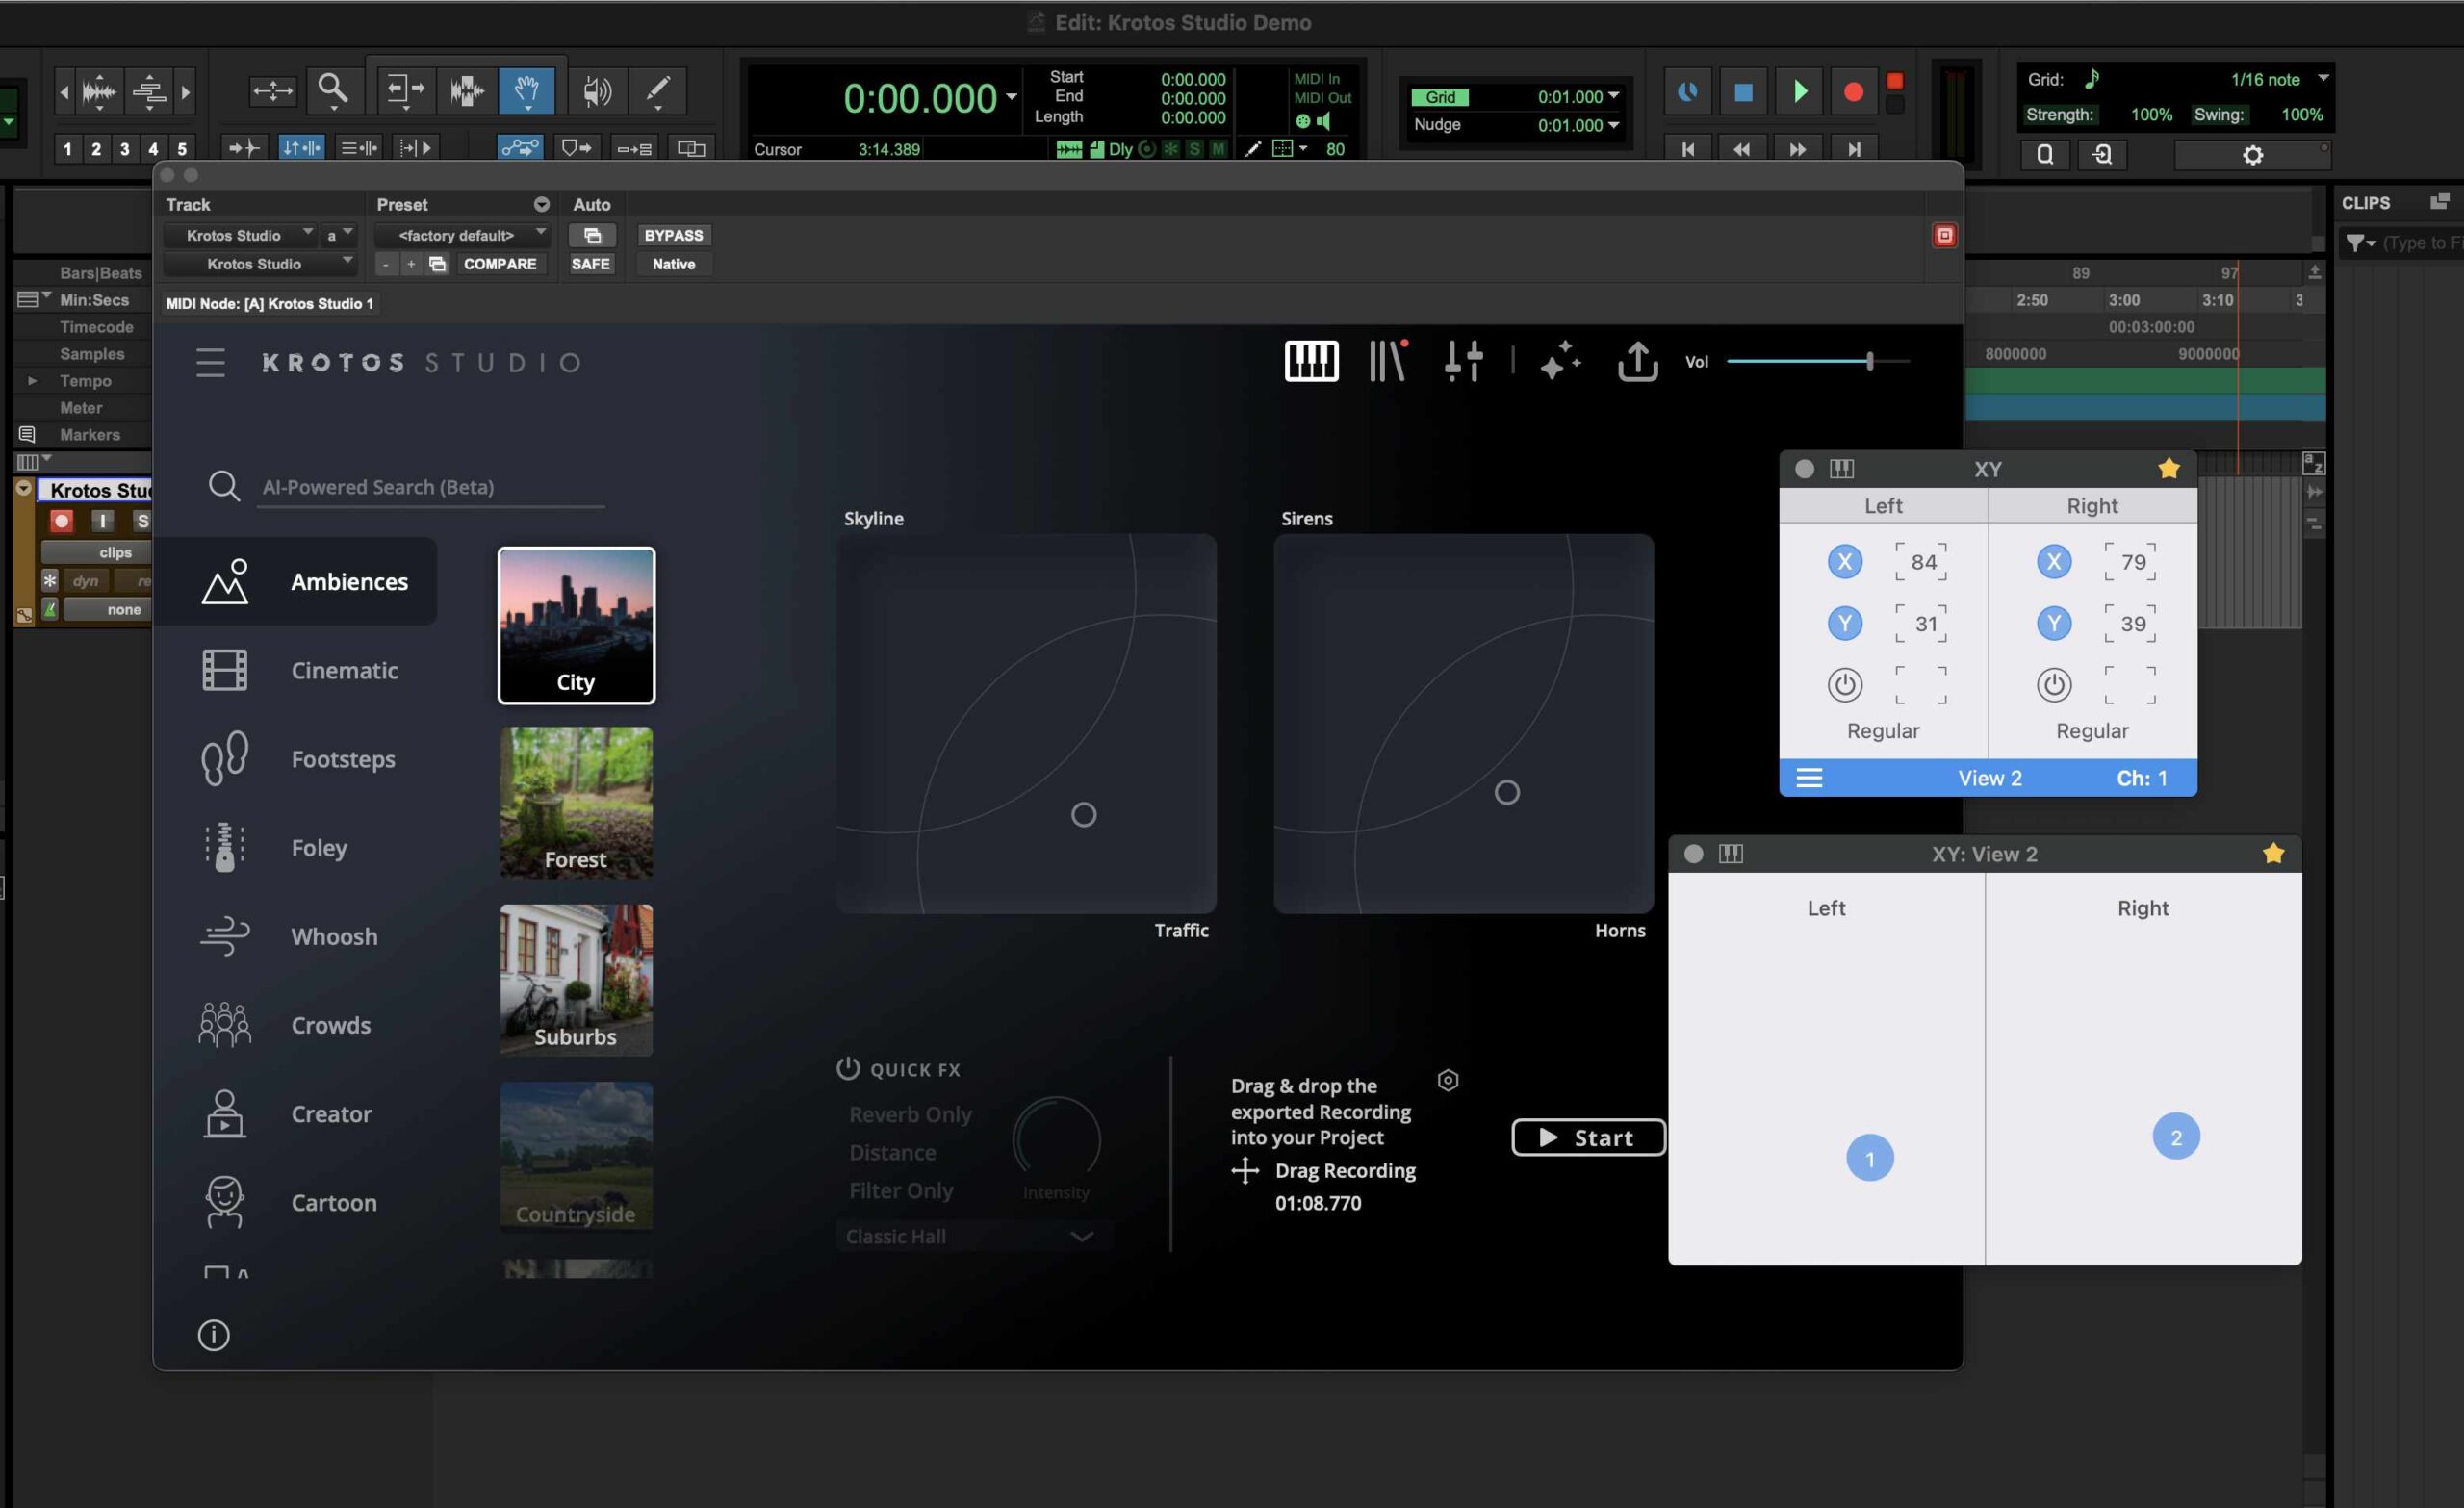
Parameter Mapped in Absolute Mode

TRY AUDIOSWIFT FOR FREE

MORE ABLETON LIVE TOOLS

MIDI Effects Wrapper for VST/AU plugins using Max For Live

DISCLAIMER: This is an experiment I did for myself and I share this information if you want to try it on your own. Be aware I can’t offer support if something goes wrong on your side. I recommend to open a new Live set, and test this device or the ones you make in many different ways before using them in important projects. Third party plugins behave differently between developers, and depending if you choose VST, VST3 or AU formats, the settings will be saved or not after closing the project, or in my experience, they could even crash Live. It’s very important to fully test the devices.

I’m Nigel, developer of AudioSwift MIDI Trackpad and I want to show you how third party VST/AU MIDI effects could be used in Ableton Live, inside the same track where the instrument is. Normally you would require to put the VST/AU MIDI effect on a separate track and do the internal MIDI routing to play an instrument. But there’s a workaround using Max For Live devices as wrappers or containers for these plugins (at least on Live 12).

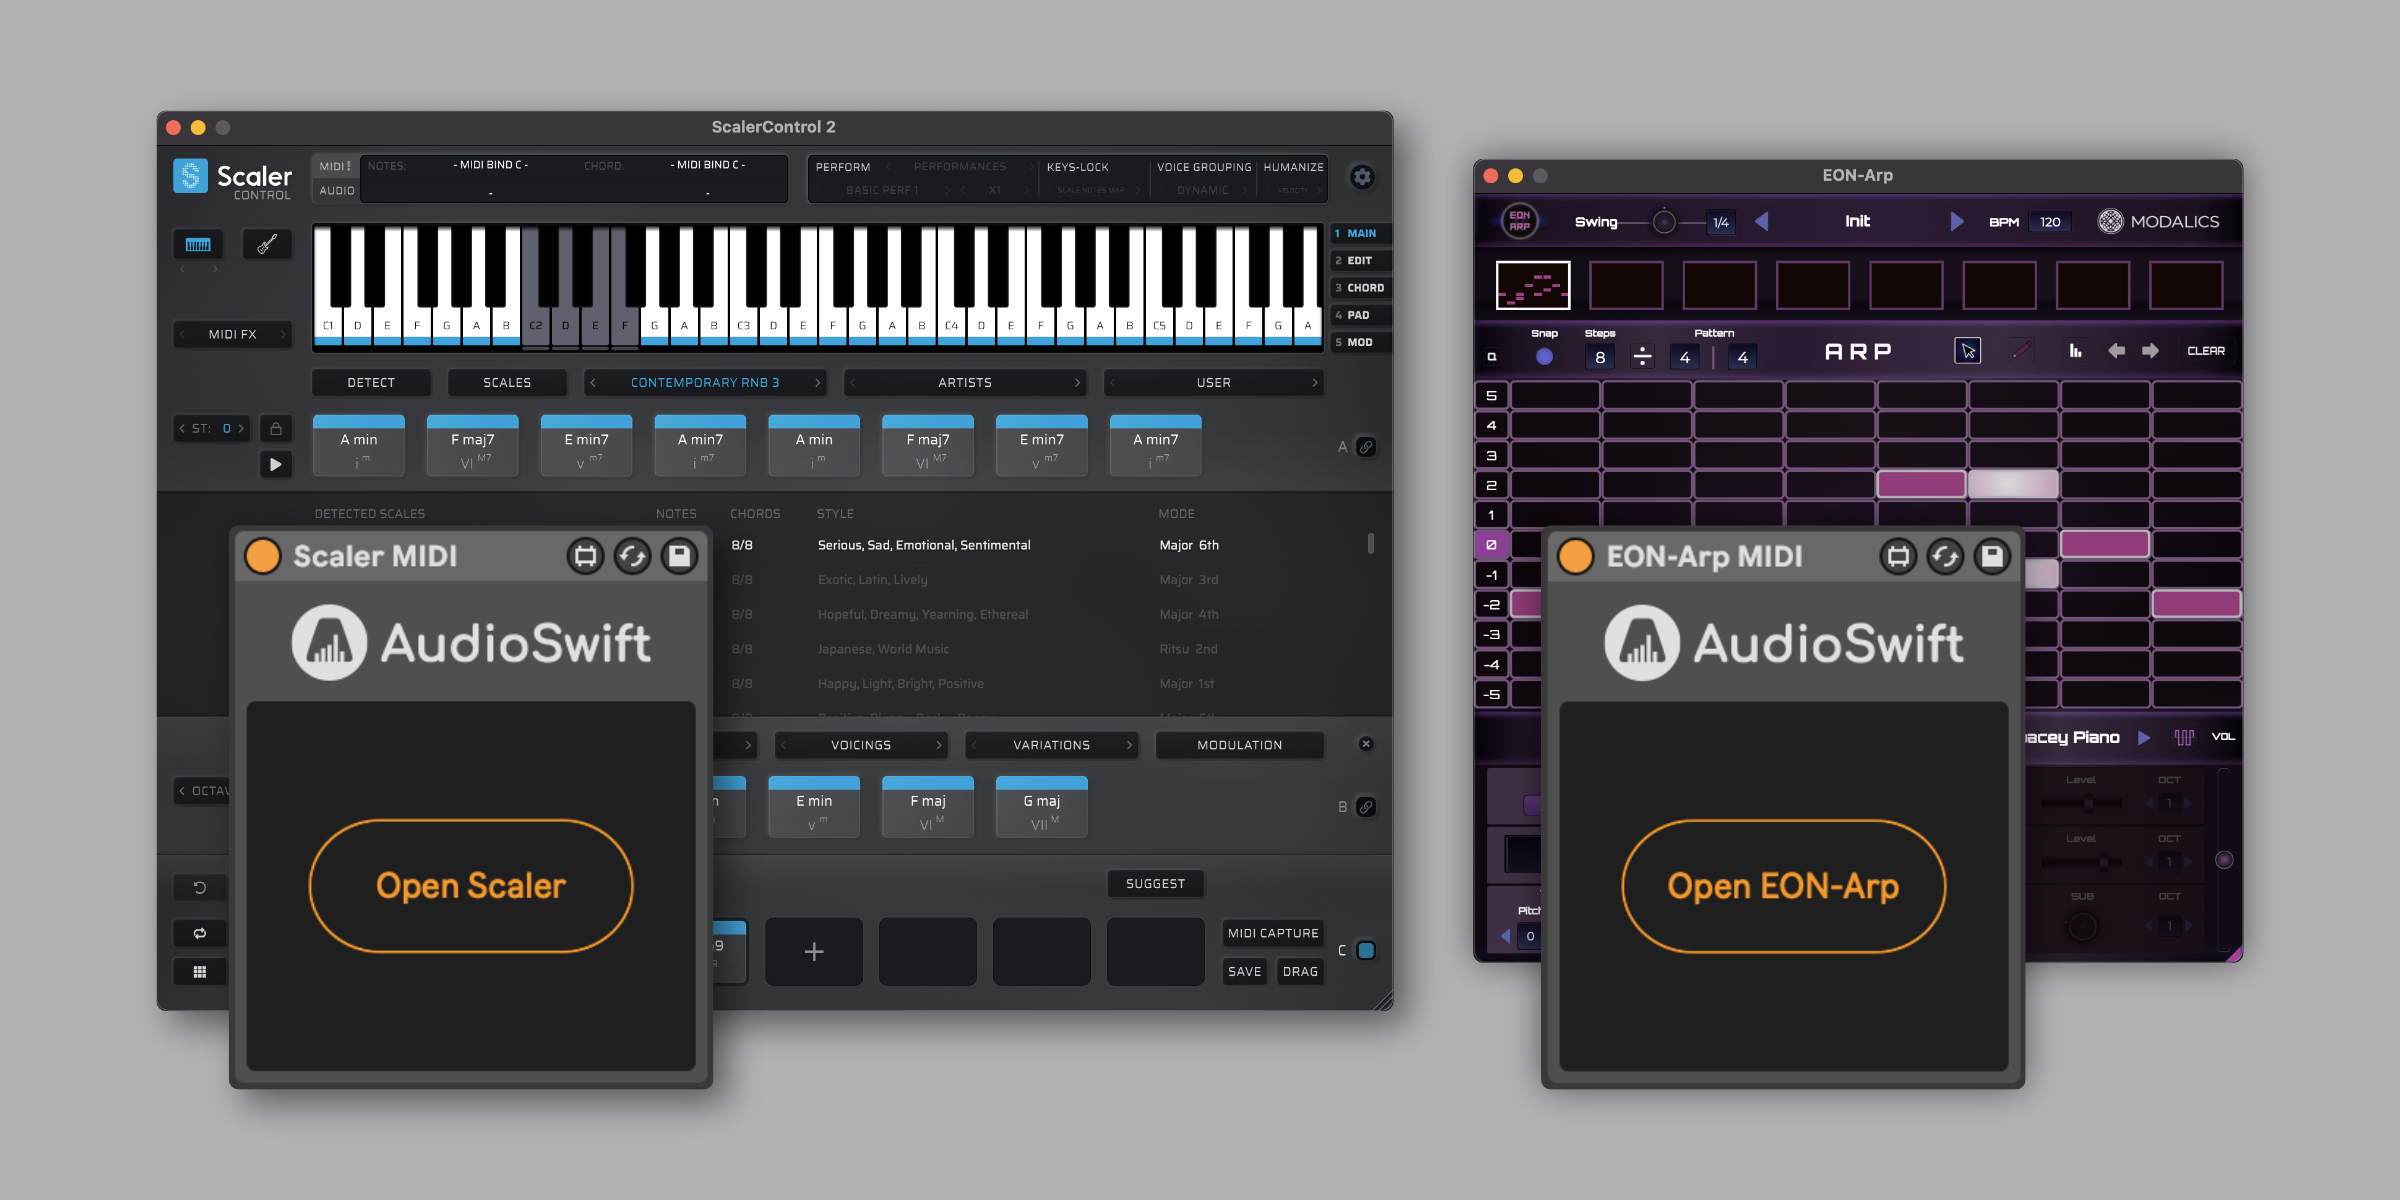
Here is a demo using Scaler for chord progression with single notes, feeding Modalics EON-Arp that generates a pattern, all in the same track with u-he Hive synth. For the MIDI controller I’m working with my MacBook keyboard to trigger single notes, and the trackpad with my app AudioSwift as XY pads for modulation.

Until Ableton finally allows third party VST/AU effects inside the same track, you can experiment with this Max For Live patch I made and use it as templates for your MIDI plugins. I’ll show you how to configure them. Basic knowledge of Max is required but we will not do extensive programming here; just a few clicks and change a couple of parameters to customize the container for your plugin. You’ll need to do it once for each MIDI effect plugin. The patch was made with Ableton Live 12.0.2 Suite and Max 8.6, and I tested it on Live 12. Unfortunately, the MIDI Effect wrapper doesn’t seem to work on Live 11.

Download MIDI Effect Wrapper

Configuration

Save the Scaler MIDI device where you usually save your Max For Live devices. Insert the device in a MIDI track. Click the icon to edit the patch in Max, unfreeze it and switch to Patching Mode. I’m going to use this as a template for creating an EON-Arp wrapper/container.

Scaler MIDI in Patch Mode

As you can see, the programming is very simple. The only UI object is a button to open the plugin in a floating window. There’s a vst~ box object where the plugin is loaded. The MIDI comes in and out of the plugin, and the audio signal is not used. In this case, it shows Scaler. If it also says Scaler at your side, it means it found the Scaler plugin in your computer, the device is ready to work and it doesn’t need more changes. If the vst~ box object is empty, it means it didn’t found the plugin and it needs to be loaded.

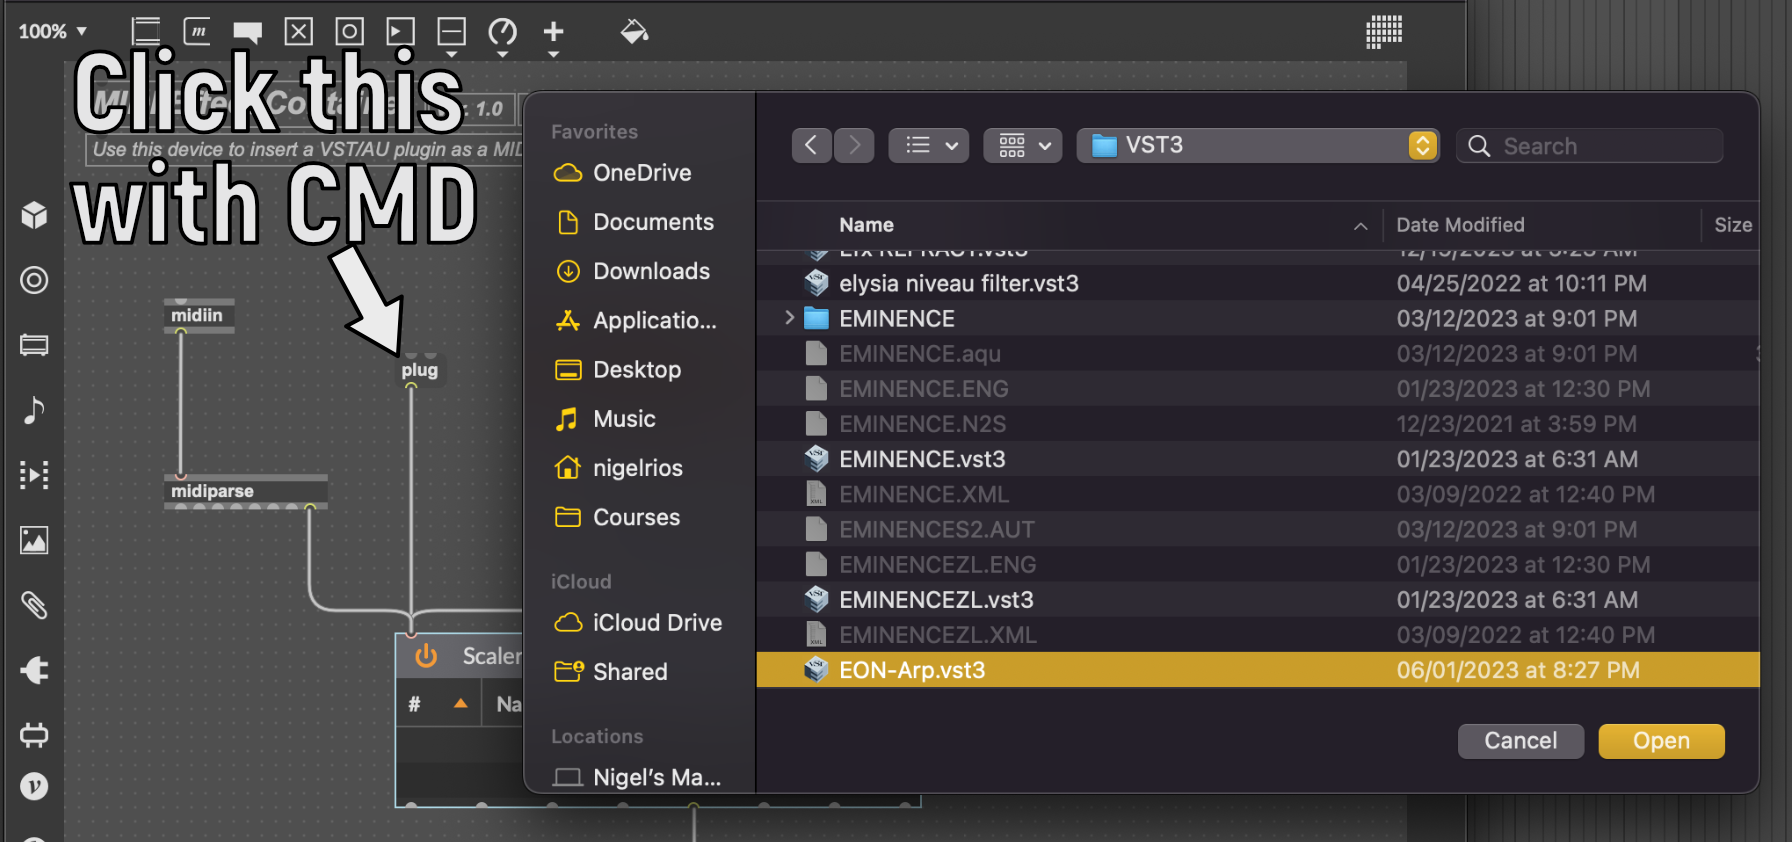
Since this will be a template for EON-Arp, in Max I click “Save as”  to save the patch with the name EON-Arp MIDI. In the patch, while pressing CMD, click the “plug” message box. It will open a file browser to change the plugin.

Click “plug” while pressing CMD.

Look for the plugin in your computer, in my case it’s EON-Arp. The path will be different if you’re on macOS or Windows. After doing some tests, I chose the VST3 version of EON-Arp because the VST and AU formats weren’t saving the changes I made inside the plugin after closing the project. This is why it’s important you test each version and choose the one that works without issues.

The plugin EON-Arp is now loaded in the patch. The next step is to change the text of the button to open the plugin because right now it says Scaler. Click the button object and go to the Inspector panel, scroll down to Text Off Label and type “Open” with the name of your plugin. I made this object Hidden in Parameter Visibility to avoid unnecessary changes in the Undo history when opening and closing the plugin.

Edit Text Off Label from “Open Scaler” to “Open your plugin”

Everything is set up. Change the patch to Presentation Mode, freeze it again and lock it. Save the patch in Max and close the window. The patch is ready to be used containing the new VST/AU plugin. Insert an instrument device after the MIDI Effect, click the open button and test it. Play your MIDI Controller.

Limitations & Issues Found

You’ll notice that after opening the plugin window from the wrapper/container, Live won’t react to some of its key shortcuts. For example, pressing the space bar won’t start the playhead. You’ll need to click twice anywhere in Live to use the space bar again, or use your MIDI controller button for play.

You’ll also notice the plugin window will disappear if you click Live, and you’ll need to open it again by clicking the button. Unfortunately, I couldn’t find a workaround for this. The open button can’t be MIDI mapped because as I mentioned before, its Parameter Visibility was hidden to avoid unnecessary Undo history changes.

In my experience with Scaler, I chose the AU format that says ScalerControl2. If you’re on macOS, this version doesn’t appear in the Live browser, but it can be selected when configuring the patch in Max. It’s used in Logic Pro as a MIDI effect and it’s a version of Scaler without the sound engine. With this AU version, I tested 10 Scaler wrappers instances in different tracks, each with a different virtual instrument, and an additional regular VST Scaler plugin in another track as the master. I linked the states of all instances with the master using Scaler link feature and it worked.

With the Scaler VST3 version, the settings weren’t saved after closing the project. With the VST format I couldn’t load more than 3 to 4 instances because Live crashed and I couldn’t even open the project again.

Also with Scaler, I found that after inserting the wrapper in a track, it messed up with the previous Undo history until that moment. You’ll only see multiple Undo changes for “Scaler MIDI” if you want to go to a past change. It will only detect the next Undo changes. This doesn’t happen with my other VST/AU plugins. I would recommend to insert the Scaler wrapper in the early stages of your project.

Wrapping up…

Let me remind you (again) to test everything. Test many instances of the wrappers in the same project, save the project, close it, open it again. Bounce the project. Do all notes play right?

I hope you find this information useful. If you’re on macOS check out my app AudioSwift. It transforms the trackpad into MIDI tools like sliders, XY pads, MPE and more. I made custom scripts for the mixer and for device macros to improve the workflow in Ableton Live. Try the AudioSwift free trial for 15 days.

Also, if you work with MPE controllers, check out my MPE Modifier device.

I want to thank Tom Glendinning, also known as ELPHNT. I recently watched one of his webinars showing how to create custom wrappers using Live UI objects. I got inspired into doing these MIDI effects wrappers for my VST/AU plugins.

MORE ABLETON LIVE TOOLS


Click to learn more

Update – May 1st, 2024 – TATAT VST3 Test

I did another test with the VST3 version of TATAT by K-Devices. TATAT is a generator of random MIDI notes and it worked great with Scaler in front changing the chord progression. Here is the demo:

I later tried to create a custom UI for the TATAT MIDI Wrapper, to be able to control the parameters inside the plugin using my trackpad MIDI controller. It looked like this:
TATAT MIDI with custom UI controls

However,  this time test crashed the project after a couple of minutes of using it. The crash was so bad I couldn’t open the project again.

New AudioSwift Mixer Script for Ableton Live

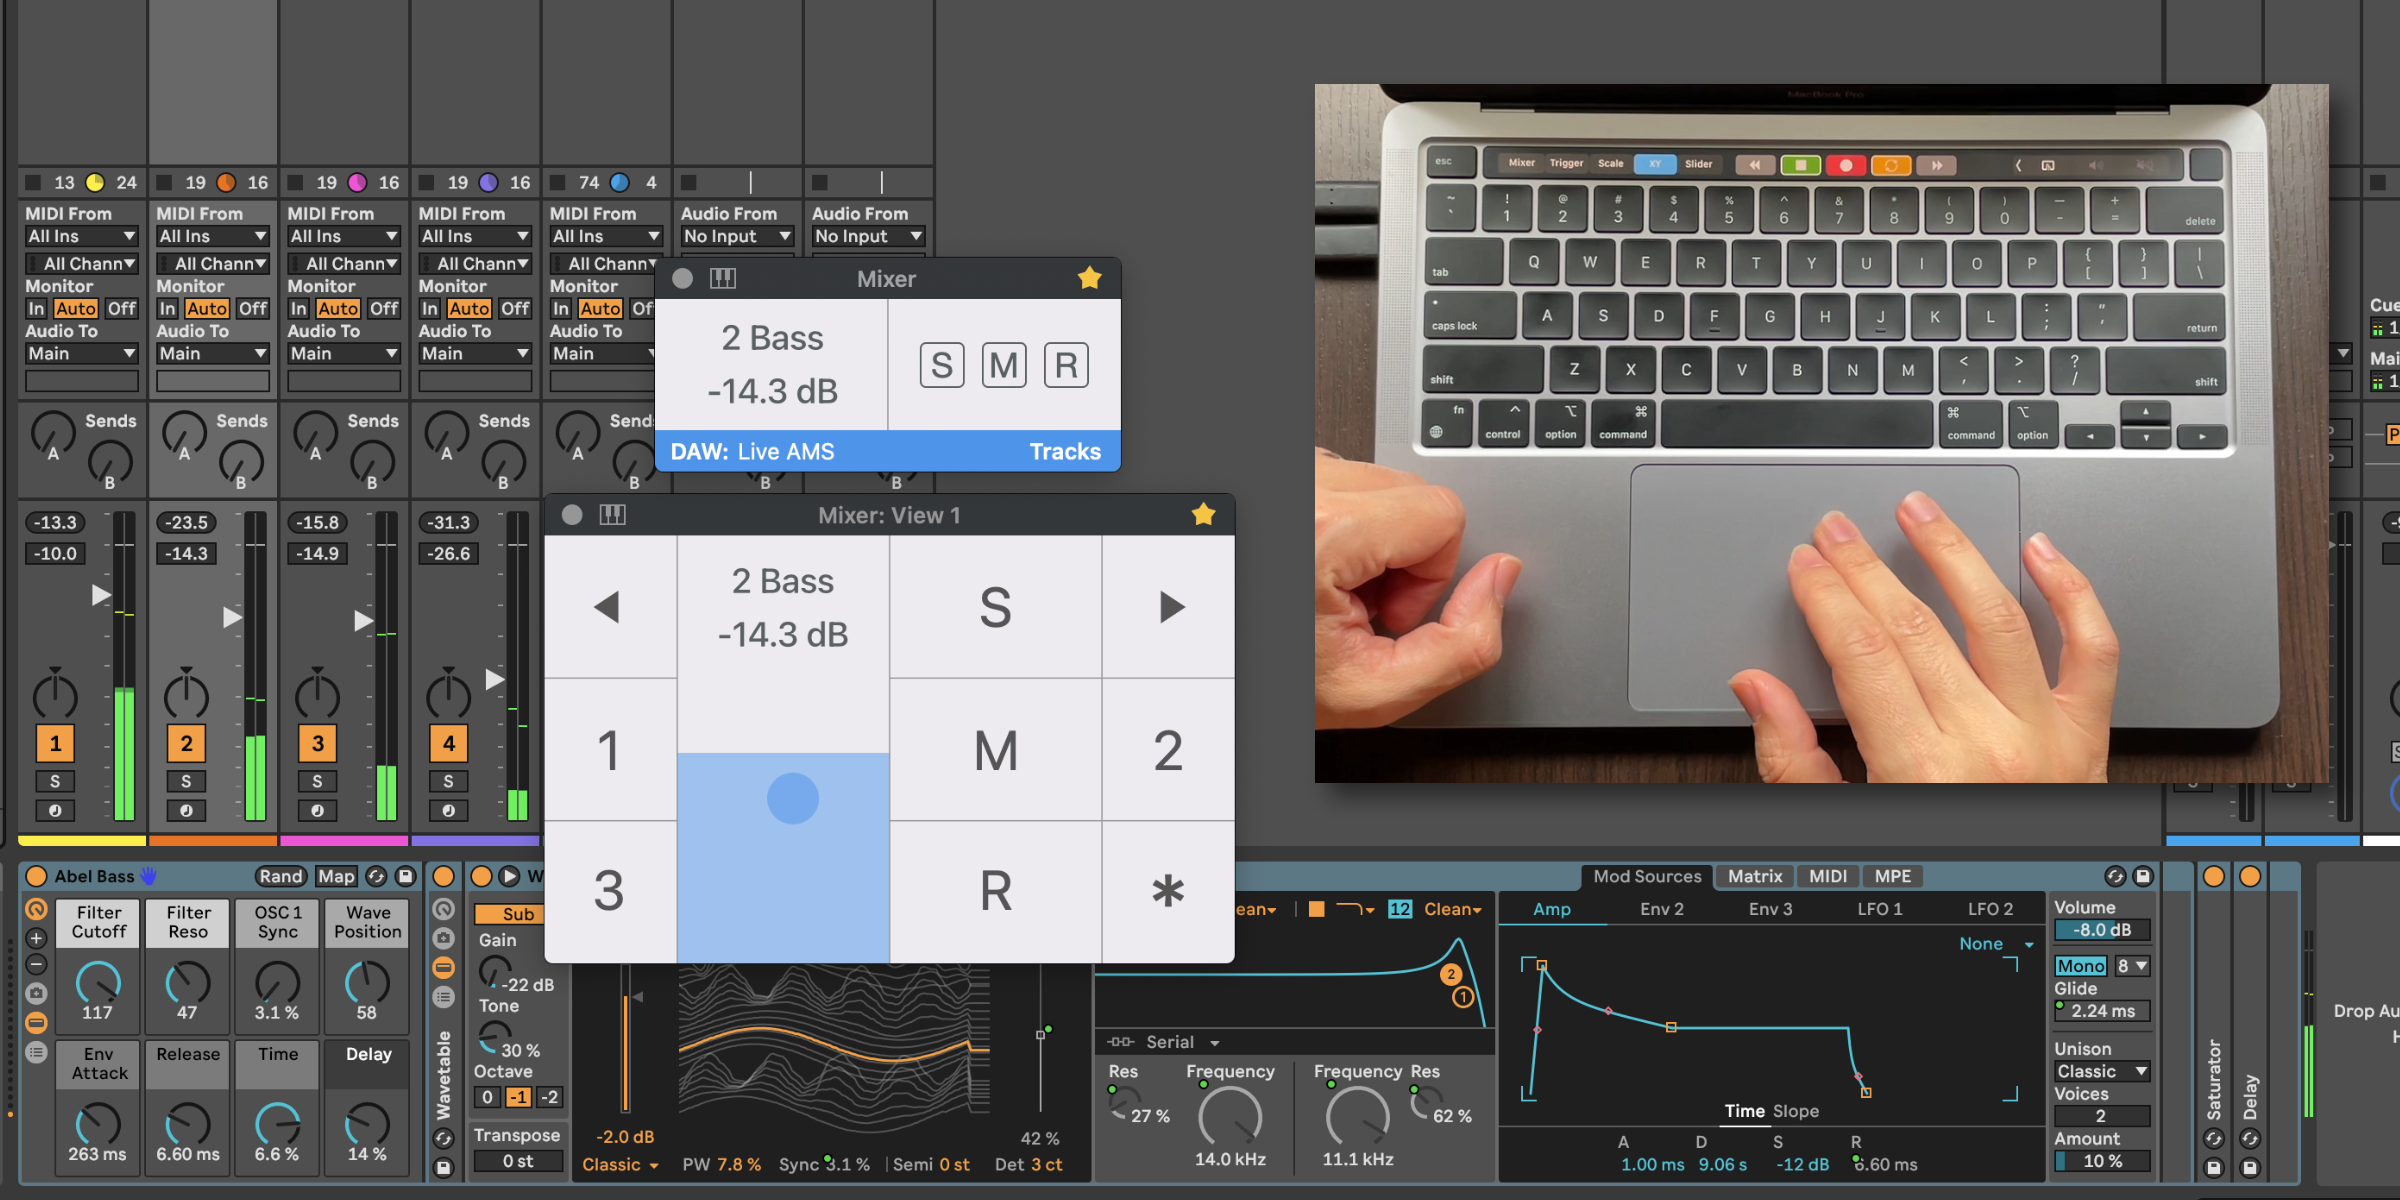
I’ve released a new Ableton Live Script for the Mixer Mode in AudioSwift. AudioSwift Mixer Script (AMS) adds better control of the mixing section in Ableton Live using simple touch gestures on a trackpad. It works with the recent released AudioSwift version 2.3.7 beta and it has been tested in Ableton Live 10, 11 and the new 12 version.

Previously, AudioSwift in Mixer Mode worked with the Mackie Control protocol (MCU). The protocol had a couple of limitations like clicking on a track and focusing the trackpad controller to that track. We can now select any track and the controller will be focused. We can even select a device parameter, and it will automatically map the parameter to the trackpad fader. The script also adds a couple of key shortcuts for commands in Ableton Live.

Download the script and the current AudioSwift Beta version

Use the AudioSwift Mixer Script for controlling faders and panning, while you can work with our previous AudioSwift Control Script for controlling multiple macros and device parameters at the same time. Both scripts will improve your workflow in Ableton Live, especially if you work mobile with a MacBook. Check out the video tutorial below on how to configure the AudioSwift Mixer Script in Ableton Live.

MORE ABLETON LIVE TOOLS

Custom Ableton Live Drum Rack

UPDATED – October 17th, 2024

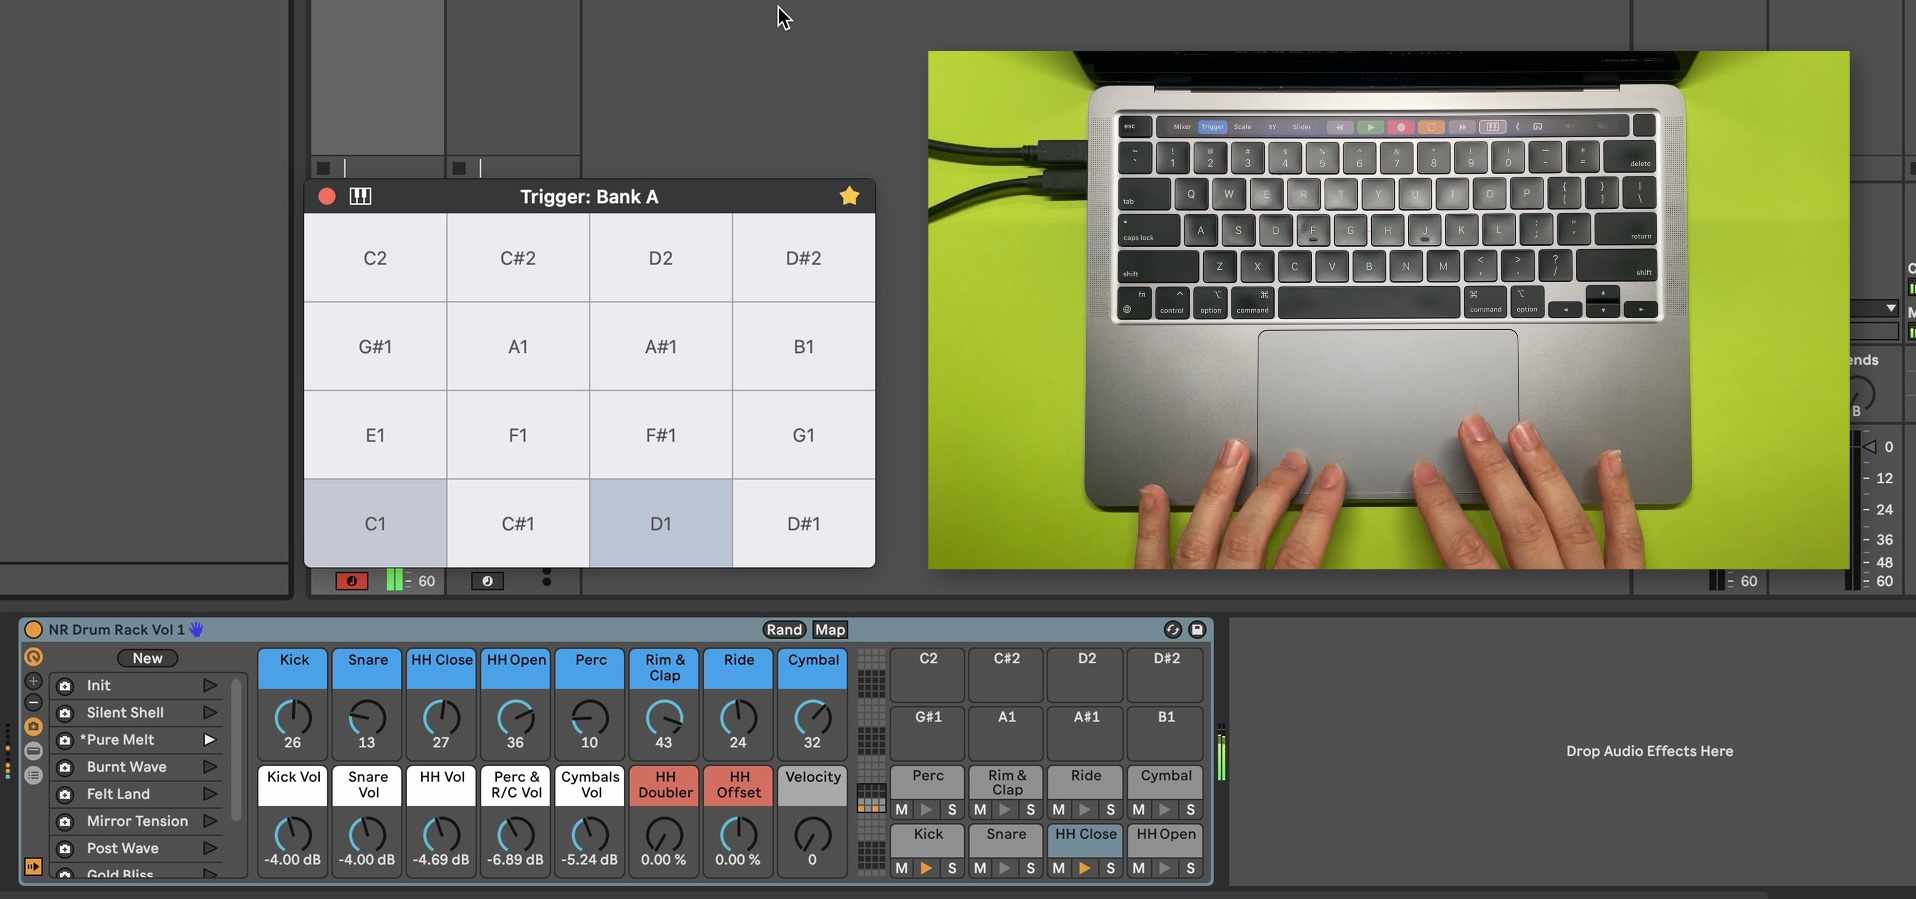
There’s popular video on Youtube “The Last Drum Rack You’ll Ever Have To Make” by Chris Petti, Ableton Live Certified Trainer. In the video he shows a technique in Ableton Live using Macros and Sampler, to group drum samples and easily go through them with the Macro knobs, instead of searching via the Browser.

I made a custom version inspired by this video. It’s an empty Drum Rack preset that you can download for free (link below). You can then populate the preset with the samples of your library, save it again, and it will  be ready to use any time in your projects. The difference with his version is that I used Simpler instead of Sampler, which is only available in Ableton Live Suite edition. This preset should work with all editions of Ableton Live 11.

This Drum Rack is based on 8 drum pads. Each pad has 50 empty Simpler devices. You select each Simpler and drag and drop your samples there. Everything is already mapped to be used with the Macros. The Macros select the samples and volumes of the pads,  plus I added additional settings like a Hi-Hat Doubler, an Offset and a control of the Velocity range of all pads. The preset doesn’t have any audio effects, but has four Return chains that you can route to the same Drum Rack or to the Returns in your project.

Update for Live 12.1 Version with Drum Sampler

I’ve updated the custom drum rack with a version using the new Drum Sampler  instead of Simpler. I reduced the available slots from 50 to 25 per pads because adding more was causing CPU spikes with sound drop-offs (at least in my computer).

Drum Sampler is a new device in all editions of Live 12.1. It’s a “simpler” version of Simpler, with a dedicated FX section where you can set the velocity to modulate either the filter or the FX, making the samples sound different with each hit. These kind of variations in the sound makes the samples more interesting.

Drum Sampler

If you’ve already created custom drum rack presets with your own samples, you’ll need to go to each Simpler device, right click it, select Simpler -> Drum Sampler and save the preset again or with a different name.

Simpler to Drum Sampler

Try it out!

Watch the following video where I explained the Drum Rack in more details and download it for free with the link below.

If you want to try out AudioSwift for macOS for the first time, there’s a 15 days free trial and we have tutorials on how to set it up in your computer.

Download Custom Drum Rack

Try AudioSwift Beta version for macOS

More Ableton Live Tools


Ableton Live Control From Trackpad with AudioSwift

Ableton Live Script

I’ve made a custom Ableton Live Script for AudioSwift to control the macros and device parameters directly from a trackpad with simple touches. This is great for quick access to the devices or for write automation in real time, specially when working mobile with a MacBook.

If your are new to AudioSwift, it’s a macOS app that transforms your trackpad into MIDI tools like sliders, XY pads, triggers, MPE and more. It has different controller modes, and one of them is the Slider Mode. It divides the trackpad into 4 touch sliders in 4 banks, for a total of 16 sliders. We activate AudioSwift with a five finger tap gesture, start touching the sliders to send MIDI and when we finish, we press the Esc key to turn AudioSwift off.

The Slider Mode can now communicate with Ableton Live via a custom script. The script updates the values of the device parameters to the AudioSwift’s Console and Trackpad windows, making it easy to know what we are controlling from the trackpad.

Here is a quick video demo:

Download the script and the current AudioSwift Beta version from here

In the following video tutorial, we’ll go through the steps to configure the script and we’ll show how it works with AudioSwift. NOTE: One command that is missing from the video because it was included later, is to jump between tracks. Use the Left and Right arrows to change between tracks.

If you want to try out AudioSwift for the first time, there’s a 15 days free trial and we have tutorials on how to set it up in you computer.

Find the blog post about Instant Mapping in Ableton Live mentioned in the video tutorial here.

MORE ABLETON LIVE TOOLS

MPE Modifier – A New MaxForLive Device

UPDATED – May 7th, 2024

MPE Modifier is a free MaxForLive device that does two simple tasks. It changes the incoming Slide and Pressure MPE messages into Control Change messages per voice, and also replicates global messages like ModWheel, Pitch Bend, and Aftertouch to all MIDI channels. The new version 1.1 adds the option to change the Slide to Press messages.

I designed this device to be used with the MPE Trackpad option in AudioSwift, but it should work with any MPE controller like Ableton Push 3. I also did it with U-he synths in mind, but feel free to use it with other virtual instrument plugins that don’t have full MPE support and work with multichannel MIDI, like Native Instruments Kontakt or Spectrasonics Omnisphere.

The main idea of MPE Modifier is to change the default MPE messages to other CC numbers the virtual instrument usually works with. Also, any other MPE MaxForLive device before the instrument will keep responding to the default Slide CC74 and Pressure messages.

Before designing MPE Modifier…

U-he synths like Hive and Diva are multichannel but don’t have full MPE support. They don’t usually work with the MPE standard Slide CC74. All of their patches have parameters mapped by default to CC1 (ModWheel), CC2 (Ctrl A) or CC11 (Ctrl B). We would need to manually map those parameters to CC74 inside the plugin or change the CC number sent in the MPE controller. Both workarounds come with limitations, specially changing the CC inside the controller, since we can’t later edit the MIDI clip envelopes per voice if the CC number recorded is not the default Slide CC74.

The other problem is with global messages that apply to all notes or voices. The MPE standard uses a Manager Channel (MIDI channel 1), to send the global ModWheel, Pitch Bend, and Aftertouch messages. U-he synths don’t use this Manager Channel and don’t apply the messages to the notes played in the Member Channels (MIDI Channels 2 to 16). Instead, the synths only apply these types of messages if they come in the same Member Channel as the Notes On/Off.

Welcome MPE Modifier!

Here is a video using the MPE Modifier with Diva and Arpex, an expressive MPE arpeggiator device designed by Mark Towers and sold on IsotonikStudios.

AudioSwift is sending the standard Slide CC74 and Pressure messages via X and Y axes on the trackpad. Arpex is only reading Slide CC74 to add octaves notes to the pattern. Pressure is passed thru to the MPE Modifier, which changes the messages to CC1 or ModWheel. Diva then uses CC1 to modulate the filter cutoff frequency.

If you want to try MPE Modifier, AudioSwift for macOS or get Arpex, please click the links below (Arpex is an affiliate link). And when you try AudioSwift, make sure to download our latest beta version, which includes a special Ableton Live Control Script for macros using your trackpad.

SPECIAL NOTE: Sustain is another global message sent through the Manager Channel. However, depending on your current Ableton Live version, sending Sustain to all Member Channels could not work and could cause the notes to hang on. If this happens, disable the virtual instrument or press the stop button several times. This is not a bug of MPE Modifier. As of this writing, MPE Modifier was tested with Ableton Live 11.3.12 and sending sustain to all channels doesn’t work.

New in version 1.1:

  • Adds option to transform Slide messages to Press messages.

Version 1.0:

  • First version.

Download MPE Modifier

Get Arpex at IsotonikStudios

Try AudioSwift for Free

MORE ABLETON LIVE TOOLS

Free Trackpad MPE Pack for Ableton Live 11 + Tutorial

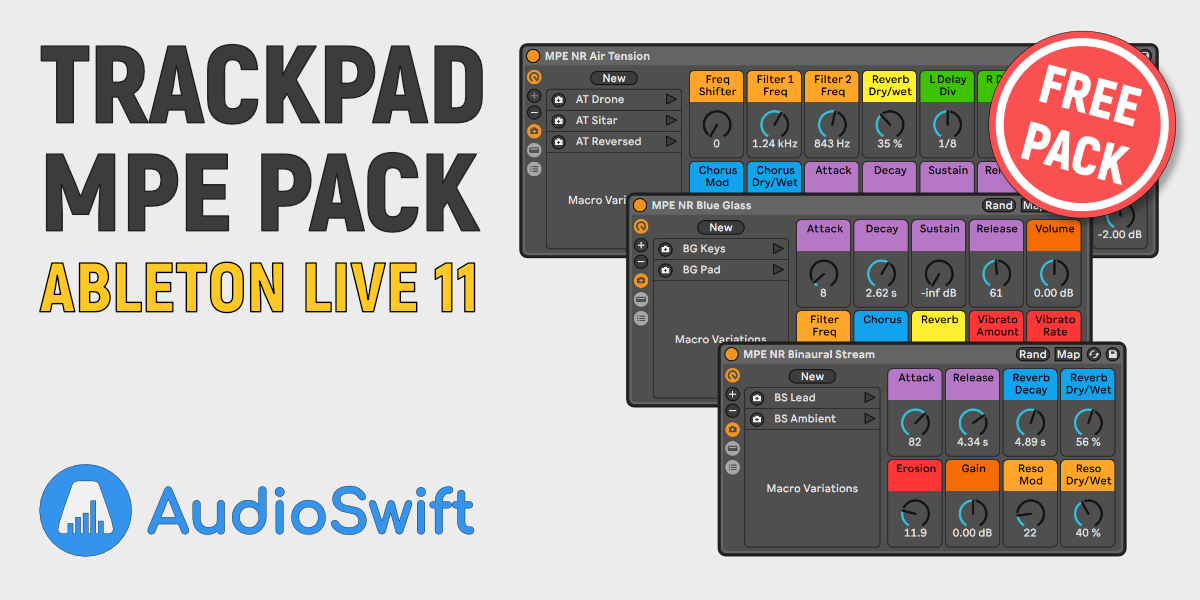
The Trackpad MPE Pack is a free collection of 12 MPE Instrument Racks for Ableton Live 11 Suite, originally designed to be used with a trackpad and AudioSwift. AudioSwift for macOS transforms your MacBook or Magic Trackpad into a grid-style MPE controller for expressive sounds. It’s a great handy tool that takes advantage of Live 11’s support for MIDI Polyphonic Expression or MPE.

Listen to some of these instruments in the following demo video:

These Instruments Racks are built with Wavetable as the main sound generator and no samples. They come with macro variations and include the MPE Control device to tweak the response curves of the controller. 

Variations and MPE Control

The MPE presets vary between drones, pads, leads and rhythmic patterns. They can also be played with any MPE controller besides AudioSwift or with a regular MIDI keyboard using the mod wheel, aftertouch and pitch bend.

If you want to try these sounds with your MacBook or Magic Trackpad, download AudioSwift’s 15-days trial demo. Check out this tutorial on how to use AudioSwift with Ableton Live devices and third party instruments:

Be sure to download Trackpad MPE Pack for Ableton Live 11 Suite and have fun!

MORE ABLETON LIVE TOOLS

Links from the tutorial:

Click to learn more