In a previous post, I showed you how to set up a trackpad with AudioSwift and MIDI2LR to edit photos faster in Adobe Lightroom. Now, we’re going to apply the same concept with Final Cut Pro X (FCPX) to color grade videos with simple touch gestures in our trackpads, instead of clicking each individual parameter with the mouse pointer. We’ll be using virtual MIDI sliders and XY pads with AudioSwift and a free macOS application called CommandPost.
This is how it works— we call AudioSwift with a four or five finger tap. The mouse pointer freezes and a small Console window appears on screen. The trackpad is transformed into a MIDI touch controller with different sliders and XY pads. Using keyboard shortcuts, we choose a Color Wheel or Color Board and start touching the trackpad to change a FCPX parameter like saturation, brightness, temperature, etc. AudioSwift sends MIDI messages that CommandPost translates into FCPX actions. Once we finish, we press the Esc key to turn AudioSwift off and unfreeze the mouse pointer.
You can either use a Magic Trackpad 1 or 2, or the built-in trackpad in MacBooks for a portable solution. AudioSwift works from macOS 10.11.6 and up, however, CommandPost needs a higher macOS version to work with FCPX.
Just to let you know, my background is in music and I developed AudioSwift for music production. I’m not a FCPX, CommandPost or color grading professional. What we’re going to do here is to get you started, by showing you how to set up everything using configuration files, that you can tweak later to your preferred workflow. So let’s start…
Download the files for this tutorial.
AudioSwift Configuration & Overview
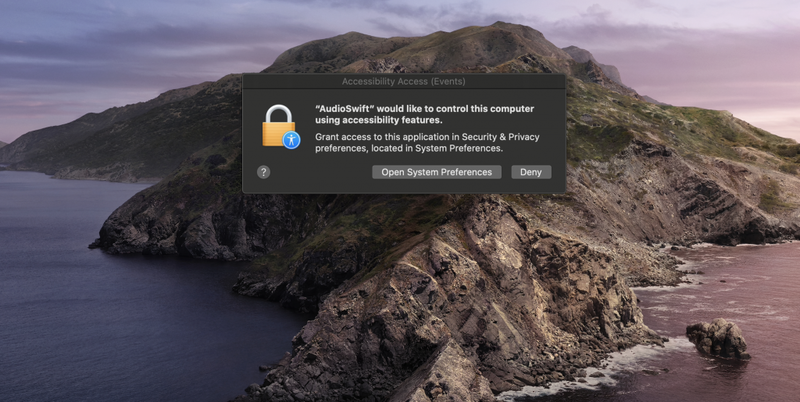
Download AudioSwift from here. Open the installer and move the application to the Application folder as it says. Launch AudioSwift and if you’re on Mojave or Catalina, it will show you the following message. Click Open System Preferences. NOTE: if this message window doesn’t appear automatically, go to the Privacy tab under System Preferences > Security & Privacy > Privacy Tab.
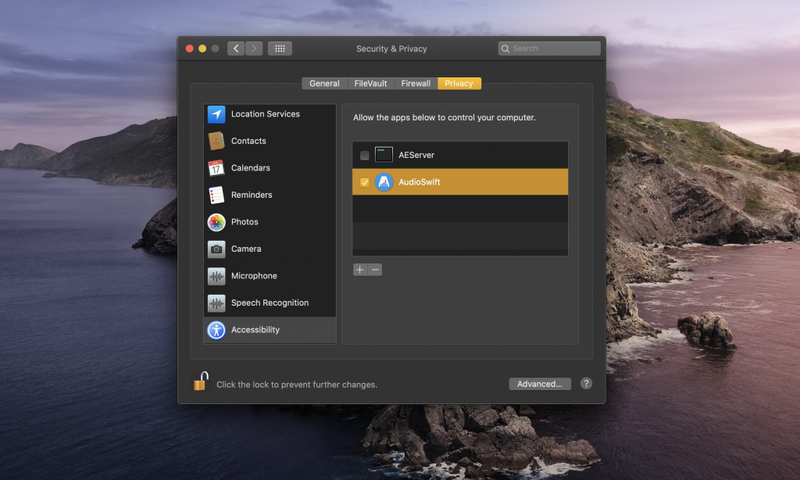
In the left column, go to Accessibility and add AudioSwift to the list by clicking the plus sign. You’ll need an administrator password to do it. Once AudioSwift is added to the right column, close the window and open the app again. The app icon will appear in the top menu bar.
If you’re new to AudioSwift or MIDI, let me give you a quick overview. AudioSwift transforms the trackpad into a MIDI controller and it’s an app that works in the top menu bar waiting to be called. With a four or five fingers tap, AudioSwift is turned on and the Console window appears. We touch the trackpad to send MIDI messages and hit the Esc key when we finish. AudioSwift comes in five controller modes, but we’re going to only use two: the XY mode and the Slider mode.
MIDI stands for Musical Instrument Digital Interface and it’s a communication protocol that connects electronic musical instruments and computers for making music. The MIDI messages are transmitted from AudioSwift via three virtual MIDI ports, and each port has 16 MIDI channels. The ports are then connected to CommandPost that translates the messages to FCPX actions. There are different MIDI messages and we’re going to use two of them: the trackpad will send Control Change (CC) messages and the keyboard will send Note On messages.
IMPORTANT: if you’re already an AudioSwift user, save your current settings before we continue or otherwise they will be lost!
Let’s import one of the configuration files we downloaded before. Go to the AudioSwift icon in the top menu bar and click Preferences > General Tab. At the bottom under General Settings click the Load button, look for the file AudioSwift.plist where you saved it and select it. AudioSwift will restart.
The main window in AudioSwift is the Console, which appears every time we tap the trackpad with a four or five finger tap and disappears when you hit Esc. Go to AudioSwift and click Show Console. If you want the console to be always on screen, click the top right star.
AudioSwift also has a utility window to learn the different MIDI zones in the trackpad. To open it, go to AudioSwift > Show Trackpad. Place both windows in your screen where they won’t interfere.
Let’s check out the CommandPost setup.
CommandPost Configuration & Overview
CommandPost is a free macOS application that allows you to speed up the workflow in FCPX with customizable tools. You can read some of the professional features it has in its website. One of them, is control surface support for many devices including MIDI controllers.
Download the latest CommandPost beta version for this tutorial (1.0.7 beta 22) instead of the official download file from their website, because it has the MIDI enhancements needed for AudioSwift. When you run the installer, it will ask first for your permission to let CommandPost control your computer. Just like you did with AudioSwift, it’s the same process as before. If for some reason it shows you an error message, click continue, close the debug window that appears and proceed with the permissions process. Then restart your computer.
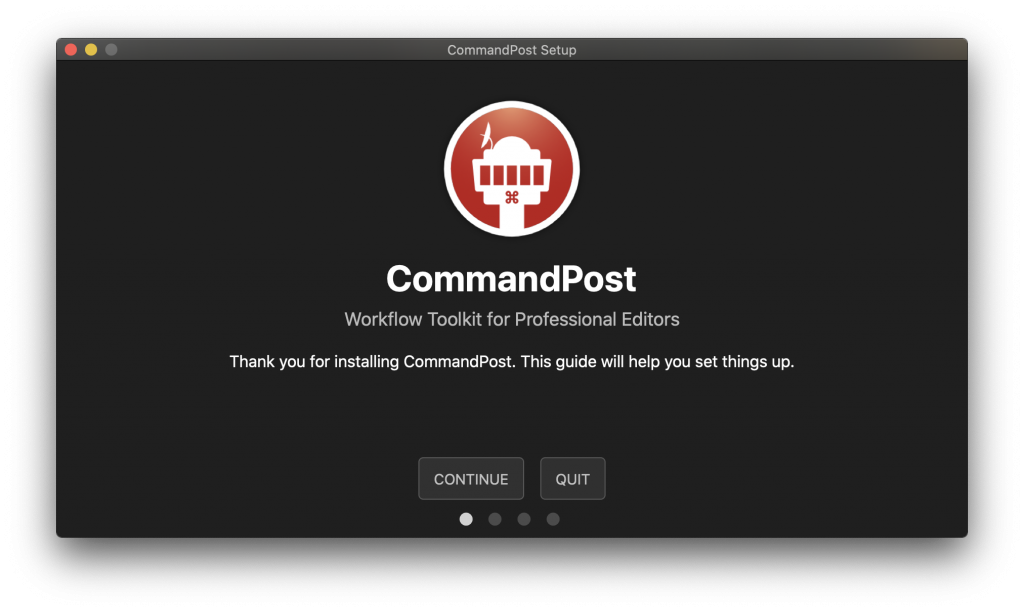
Once the computer restarts, launch CommandPost. A setup window appears with a couple of more instructions to follow. When you finish, close the window and restart the computer one last time.
When CommandPost is launched, there is one icon in the Dock and one in the top menu bar. If you click the one in a Dock it will only show you a Debug window. We won’t use it, just close it. Click the icon in the menu bar and go to Control Surfaces > MIDI tab. Although there is a dedicated AudioSwift tab, it’s only for information purposes; all the settings will be made in the MIDI panel.
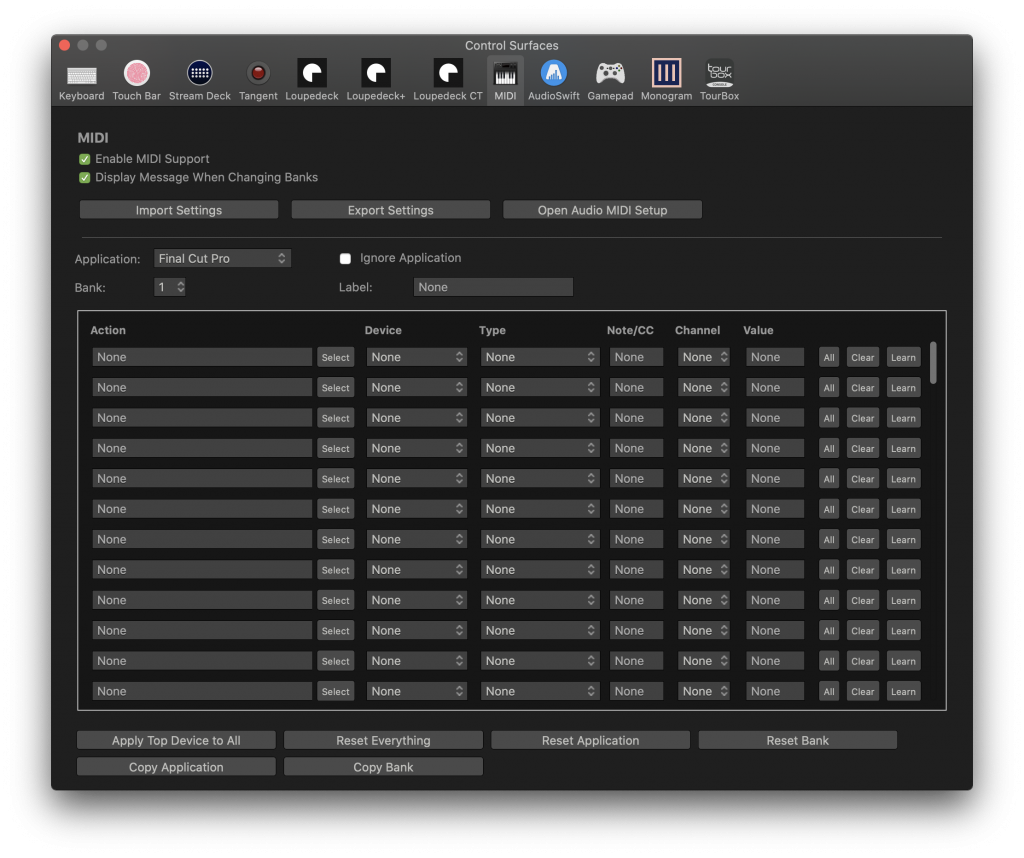
Make sure to check the Enable MIDI Support box. Then, under Application choose Final Cut Pro. Click Import Settings, select Replace or Merge and look for the configuration file CommandPost.cpMIDI you downloaded before. Close the window.
Color Wheels
Launch Final Cut Pro X, AudioSwift and CommandPost in that order. NOTE: in the top menu bar, the CommandPost icon should always be first before AudioSwift. If it’s not, click CommandPost, select Restart and wait until it relaunches. Click FCPX anywhere in the workspace and add a Color Wheel to the project.
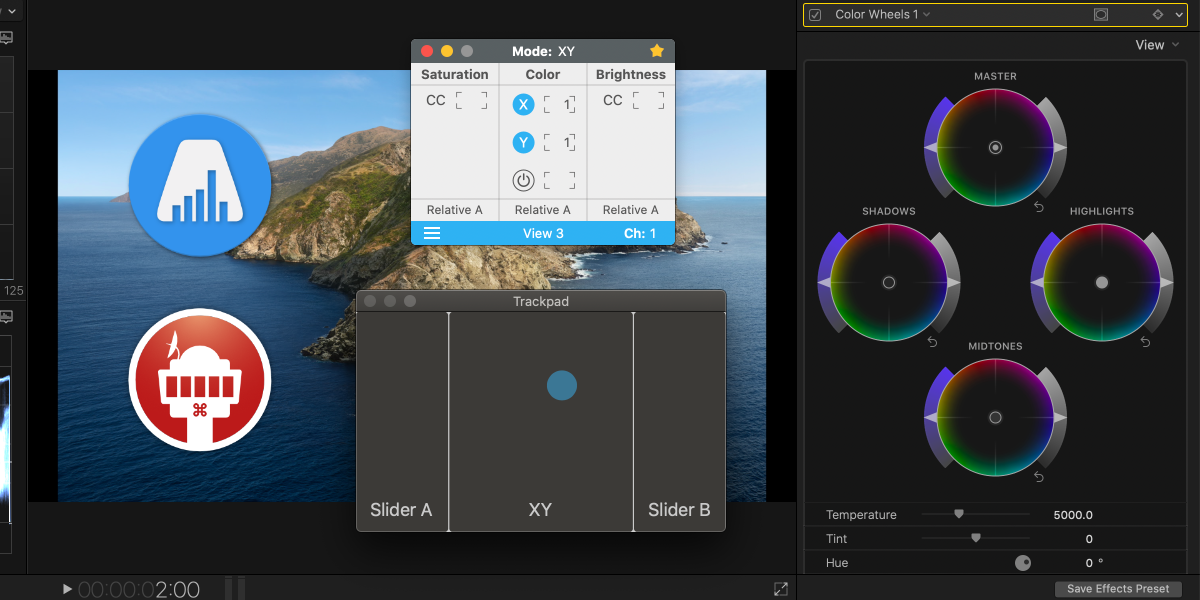
For the Color Wheels, we’re going to use AudioSwift in XY Mode and View 3. We can see the current mode in the top of the Console window and the view in the bottom. With our configuration files, it’s already set by default but both can be changed by clicking the menu or with keyboard shortcuts when AudioSwift is on. Press 4 for the mode and Z, X, period or comma for the view.
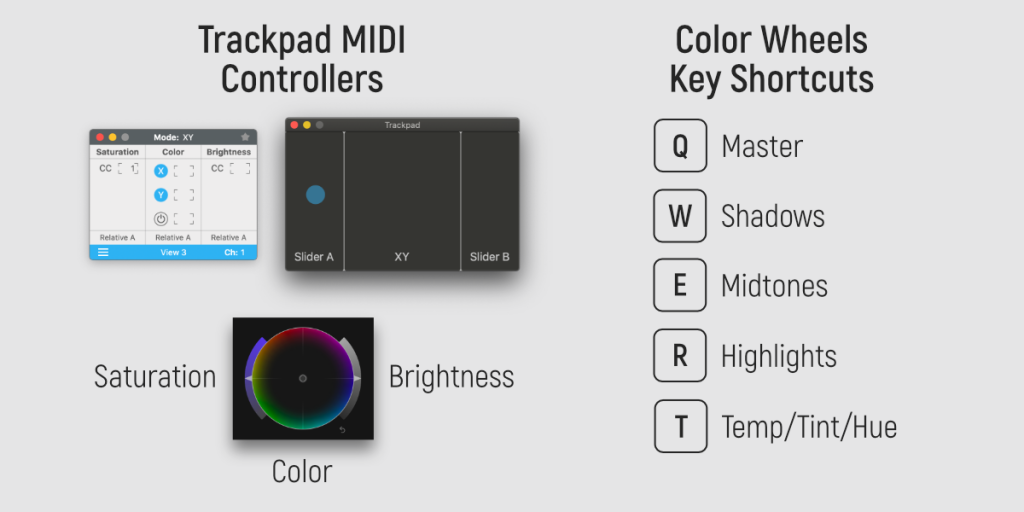
Tap the trackpad with a four finger tap to turn AudioSwift on. Select a Color Wheel by pressing one of the key shortcuts shown in the image above and start touching one of the sliders or the XY pad with only one finger. The desired parameter will move in FCPX. Press the SHIFT key while touching the trackpad to move in small changes. To reset the parameter, move the slider or XY pad just a little bit while pressing OPTION—the parameter will return to its default value. Press de S key to reset the all settings of the current color wheel.
Change to another color wheel with the key shortcut and now the trackpad will control those parameters. Once you finished color grading your clip, hit the Esc key to turn AudioSwift off and unfreeze the mouse pointer. It’s a good practice to turn AudioSwift off when you are not using the MIDI controller, to avoid changing a color wheel parameter accidentally when you really want to do is move the mouse pointer.
Color Boards
For the Color Board, we’re using AudioSwift in XY Mode View 2 for the Color section and in Slider Mode Bank A for the Saturation and Exposure. To change quickly between modes when AudioSwift is on press 4 for XY and 5 for Slider. To change the view or bank, press Z, X, period or comma.
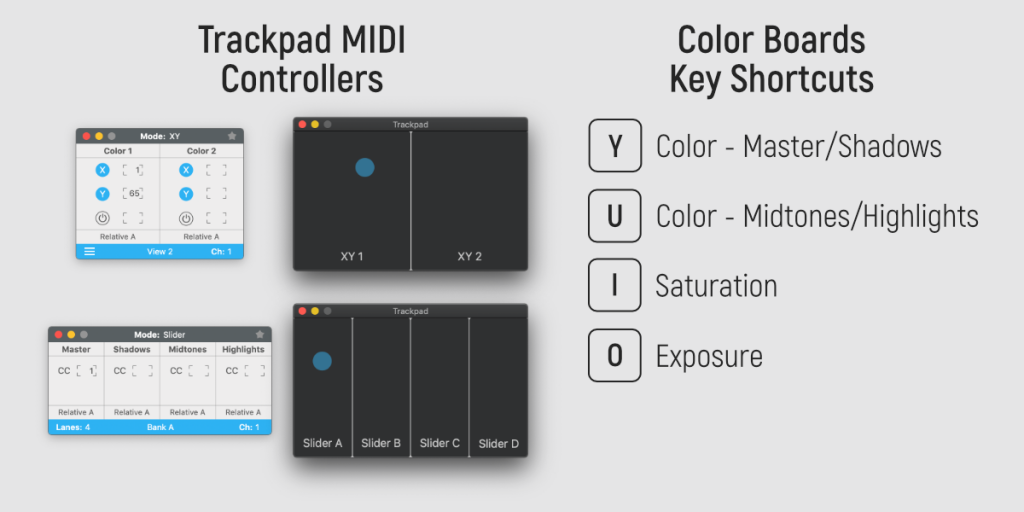
Add a Color Board to your project and tap the trackpad with a four finger tap to turn AudioSwift on. Press 4 to use the XY mode and then Z or X to select View 2. Press Y to select the first two pucks of the Colors section.
Start touching the left XY pad; horizontal movements change the percentage and vertical movements change the angle. Use SHIFT for fine tuning and OPTION to reset the puck. Repeat the process with the right XY pad and then press U to control the next pair of the Color section. When you finish, press the Esc key to turn AudioSwift off.
For Saturation and Exposure, we’re going to use AudioSwift in Slider Mode Bank A. Tap the trackpad again with four fingers to turn it on. Press 5 to change to Slider Mode. By default, it’s already on Bank A.
Press I for Saturation or O for Exposure. AudioSwift has 4 Sliders for each parameter. Move your fingers to change them. Use SHIFT for fine tuning and OPTION to reset the parameter. Press Esc to turn AudioSwift off.
Customizing AudioSwift & CommandPost
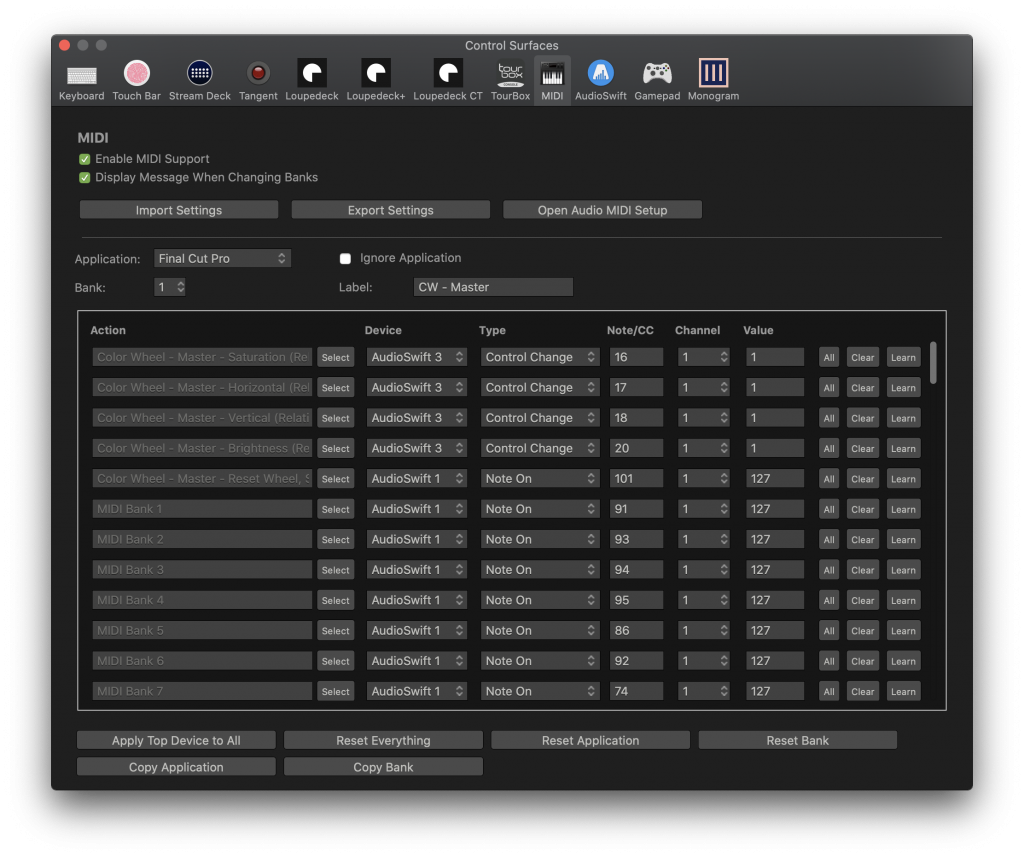
The XY Mode and Slider Mode in AudioSwift allows different MIDI configuration setups. You can read the user guide for more details. What is important to know, is that each MIDI controller has a CC number that is shown in the AudioSwift Console. This number is assigned to each action in the CommandPost MIDI panel and cannot be repeated in the same CommandPost Bank.
Also important is that the sliders and XY pads can work with Absolute MIDI or Relative A MIDI. Without going too much into details, with Absolute, when you touch the trackpad the FCPX parameter will jump to the corresponding value. With Relative A, the movements are relative to the current FCPX value on screen. This can be changed in the Console window, but not all the actions in CommandPost support Relative A.
AudioSwift can also be activated by taping the trackpad with five finger or using a key command. You can set this in AudioSwift > Preferences > General tab.
In CommandPost, I separated the FCPX parameters in different banks. Each bank has a group of Color Wheels or Color Board actions, plus a group of actions to change from one MIDI bank to the other using key shortcuts. This last group is repeated in all banks.
To add a new action, press the Select bottom. A window appears with a search box to type the command and select it. To map the MIDI to that action, click the Learn button, and tap the trackpad with a four finger tap to turn AudioSwift on. Move the slider, one of the XY axis or press a key to send a MIDI command and then press Esc to turn AudioSwift off. The controller will be mapped in CommandPost.
The only keys that can send MIDI commands with AudioSwift are from the letter Q to P, S, F and the Space Bar which has the same MIDI command as Q.
Troubleshooting
In case something is not working, check the following:
- Always click FCPX anywhere in the workspace before trying to control anything from AudioSwift.
- Remember that CommandPost should be the last app to launch. Restart it if it’s not the first icon in the top menu bar before AudioSwift.
- AudioSwift restarts every time the computer comes back from sleep mode. If this happens, restart CommandPost.
- When AudioSwift is on, it becomes the key app on screen. This means that any regular keyboard shortcut for FCPX won’t work.
- Make sure that you’re using the right view or bank in XY mode or Slider mode.
- Make sure AudioSwift is working in MIDI channel 1. You can check this in the bottom right corner of the Console window.
Try it for free!
CommandPost is free to use. If you find it useful in your workflow, I exhort you to sponsor the developers via GitHub and help them improve and maintain the app with your contributions.
AudioSwift has a 15-day full trial demo and the license costs $19.99.
A special thanks to Chris Hocking for developing the MIDI improvements in CommandPost that makes this tutorial possible. If you have questions about AudioSwift, please let me know via our support page, Facebook, Instagram or Twitter.