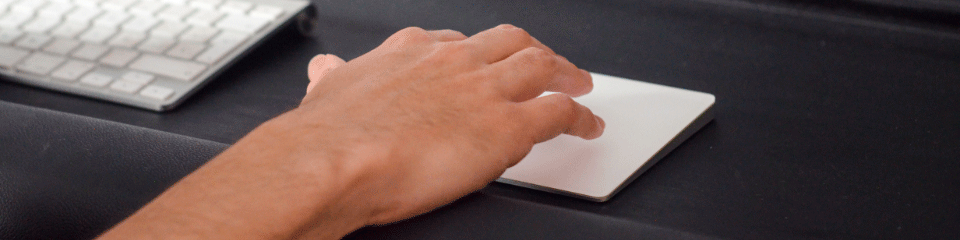
Improve your DAW workflow by using a trackpad.
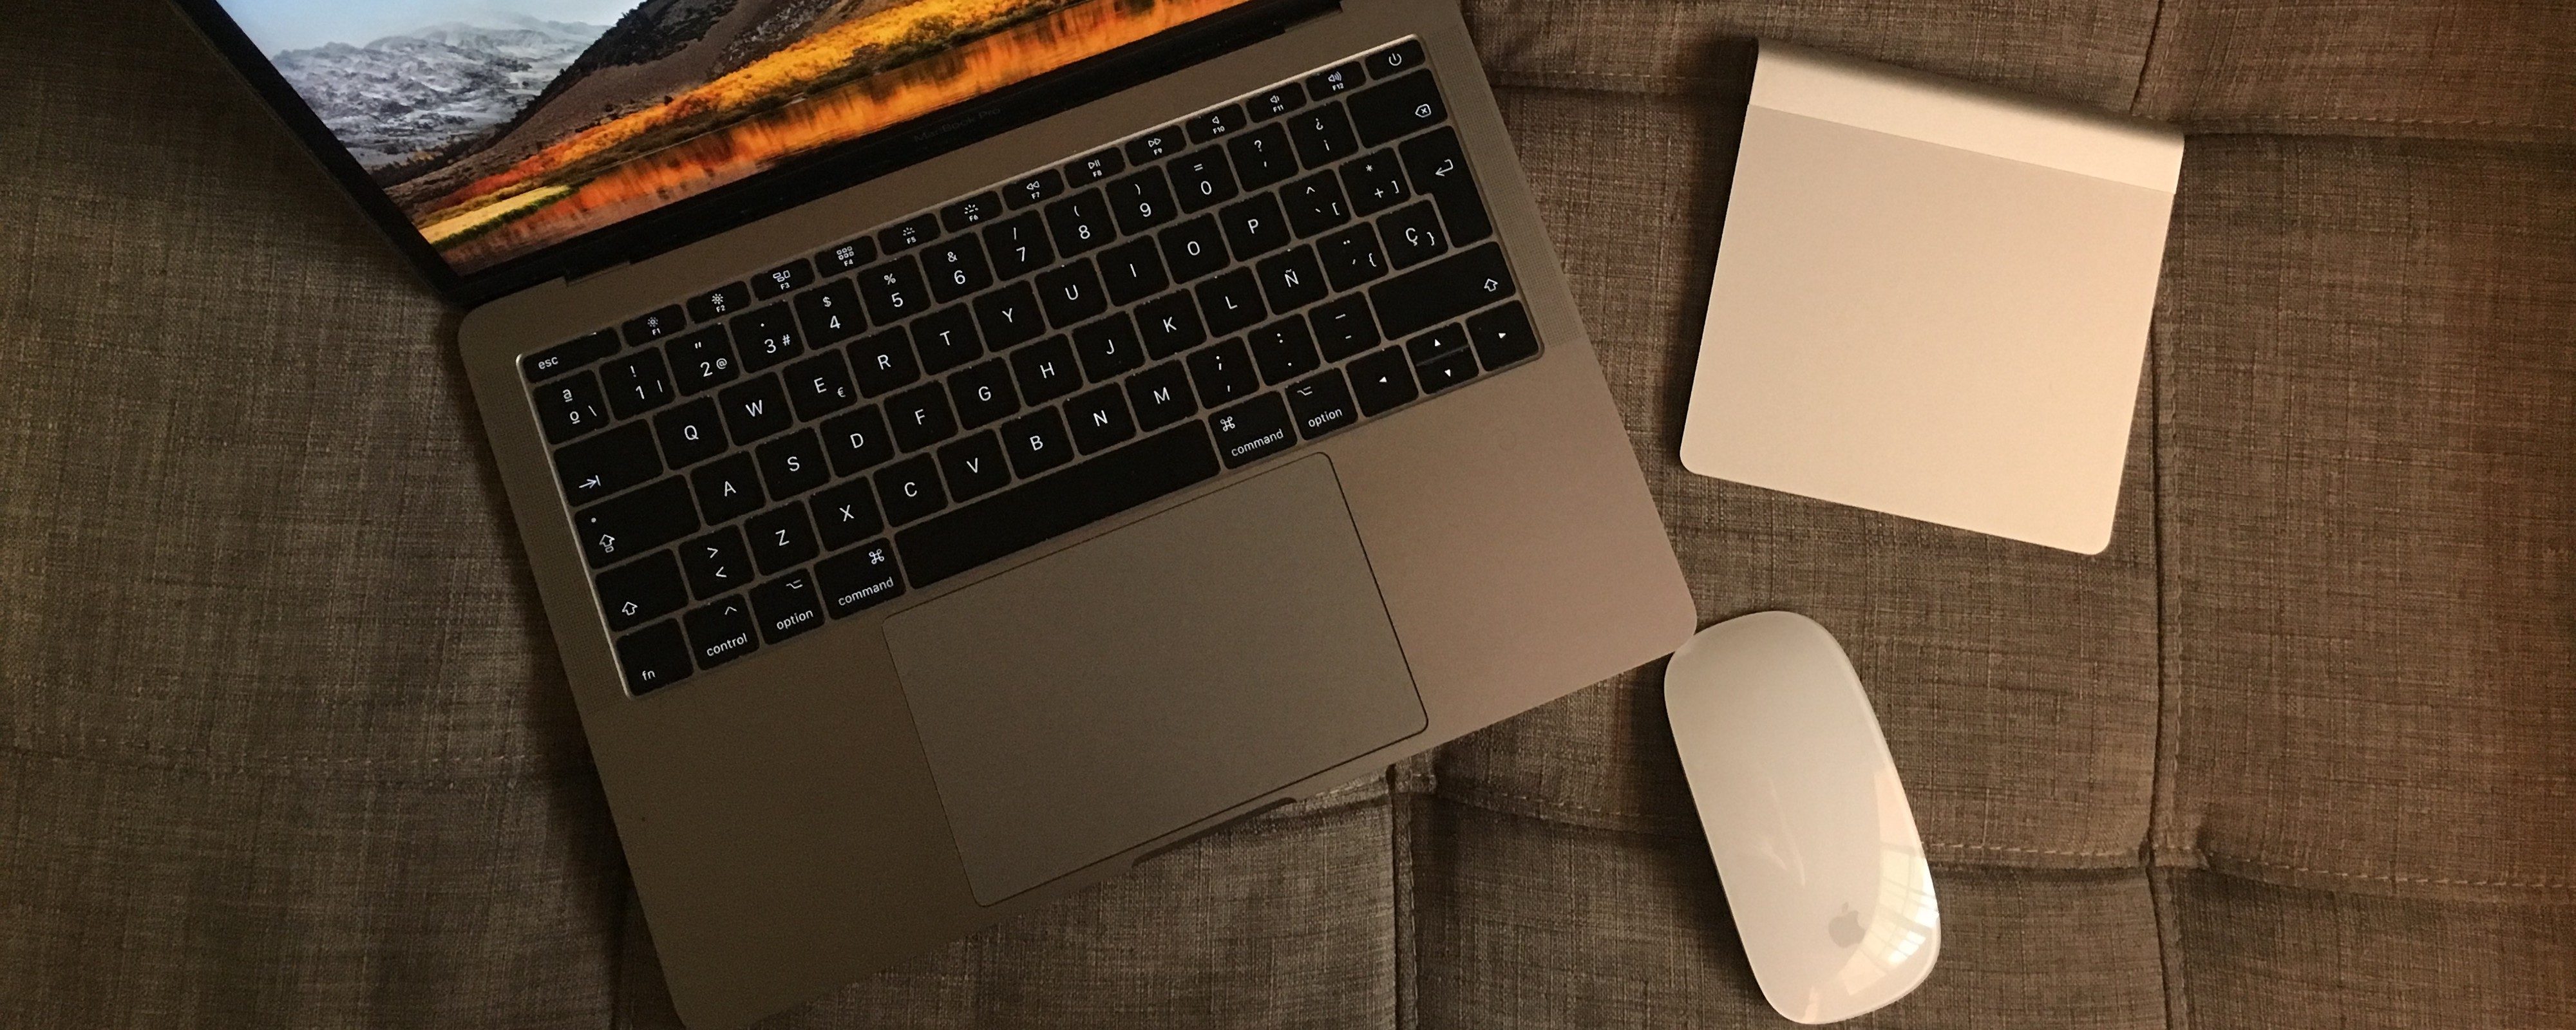
The most used input device in computer based music production is definitely the mouse. However, for Mac users a trackpad can also be a valuable tool, either by using the built-in trackpad on a MacBook or adding a Magic Trackpad to a desktop setup. I’ll be showing different ways to use a trackpad in your workflow with some tips and tricks. We’ll start with the most common macOS multi-touch gestures and then we’ll check out two apps that expand the trackpad’s functionalities: AudioSwift and BetterTouchTool.
Swipes, taps and the three finger drag
The Trackpad Preferences window shows all available gestures. By default, the trackpad is configured to allow a click by pressing its surface with one finger. But it’s better to tap the trackpad to click by going into System Preferences>Trackpad>Point & Click and enable Tap to click. When I started working with a trackpad I was only using one finger to move the pointer and click. With this setting enabled, I use the middle finger for moving and then without lifting it, I tap with the index just like working with a mouse. A two finger tap is a regular right click.
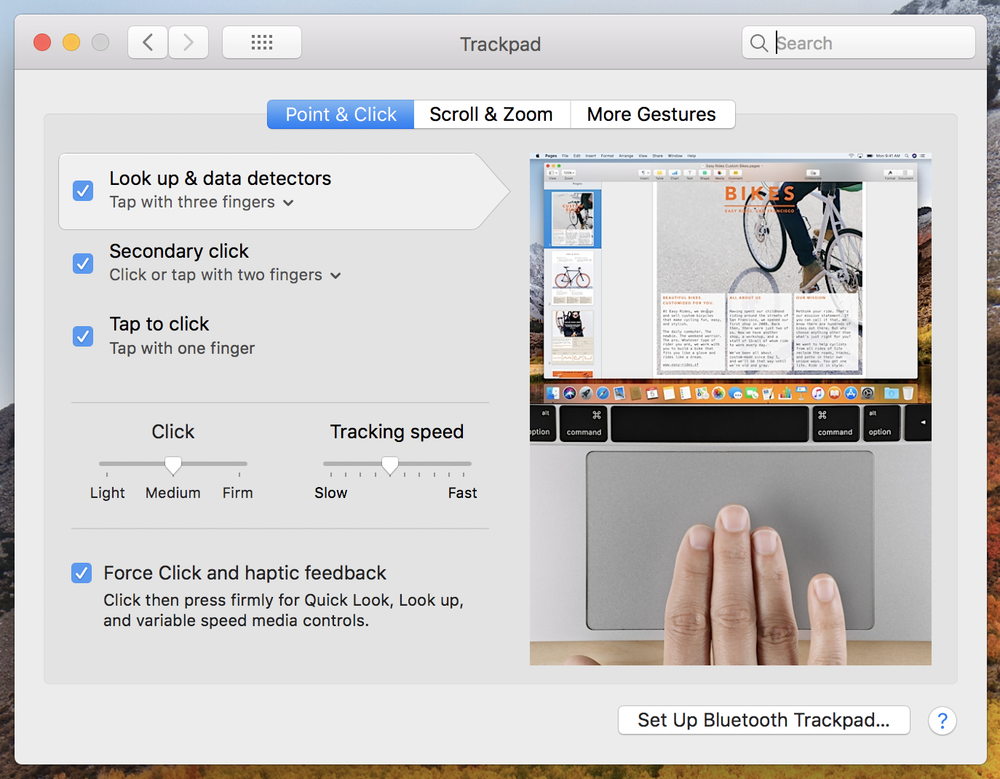
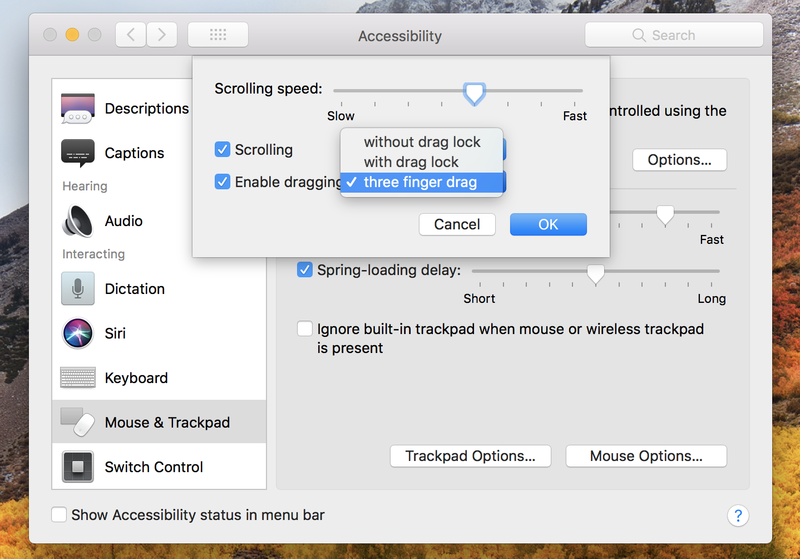
The other feature that helped me a lot was the three fingers drag. On macOS, to select or drag an object you’d normally need to click and drag — a simple tap won’t work. To change this, go to System Preferences>Accessibility>Mouse & Trackpad>Trackpad Options and enable dragging with a three finger drag. Now we can drag the objects easily.
Swipes and pinch gestures with two, three or four fingers can also be configured at System Preferences> Trackpad>More Gestures. They are helpful for things such as scrolling or showing the Desktop, Launchpad and Mission Control. I avoid using three finger swipes because they cause conflicts with AudioSwift. (More on this later.)
Besides scrolling, a two finger swipe while pressing ⌥ or ⌘ lets you zoom in and out depending on the DAW. Pro Tools uses ⌥ but only for horizontal zoom. Cubase does it with the ⌘ key. Logic Pro zooms both vertically and horizontally with the ⌥ key and Studio One with ⌘. We can also zoom in Logic Pro and Studio One with a pinch gesture after enable it at System Preferences> Trackpad>Scroll & Zoom.
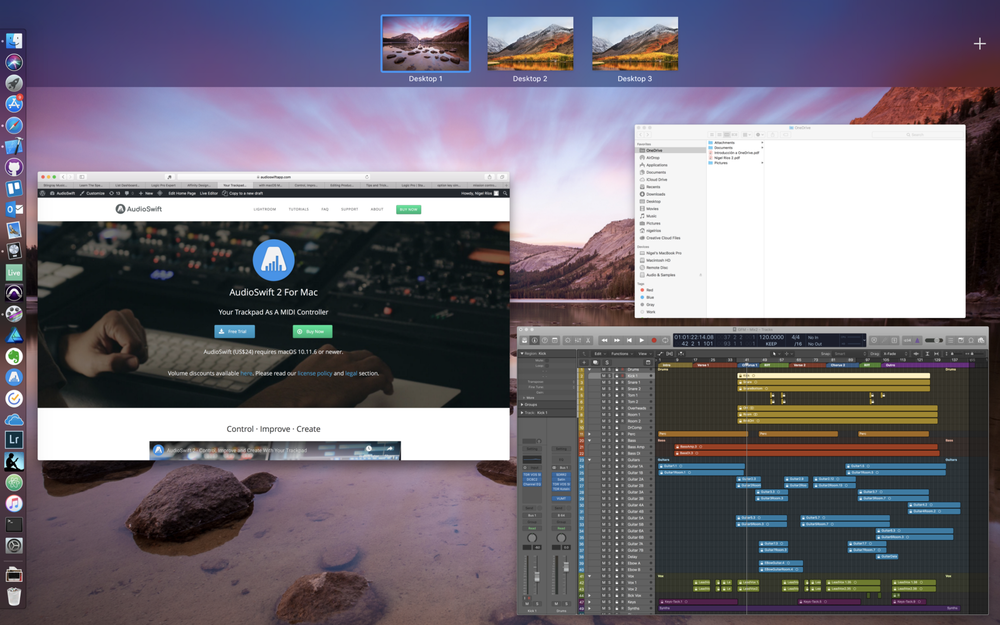
I swipe up with four fingers to open Mission Control and see all my active windows. Here I can move certain windows to a second virtual worskspace at the top and switch between workspaces by using a four finger swipe to the left or right. If you work on a MacBook, you’ll find this useful — you could for example, have the arrangement window in your main workspace and the mixer window in another one, saving space in your laptop screen.
Logic Pro users
Since Logic Pro is from Apple, it’s obvious that the trackpad integration with the software is better than with other DAWs. There are more functions available by using a three finger tap or the Force Touch feature with compatible trackpads. (For other DAWs, check BetterTouchTool below.)
First, we need to go to System Preferences> Trackpad>Point & Click and make sure that Look up & data detectors is enabled. I prefer a three finger tap instead of the force click because it’s easier for my hand. If you choose force click, make sure to also enable it in Logic Pro>Preferences>General>Editing>Enable Force Touch Trackpad.
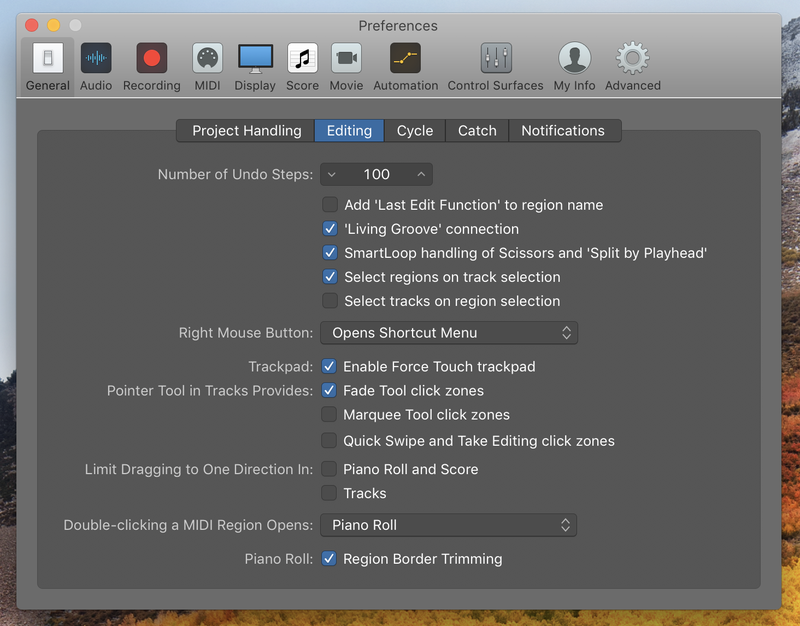
With a three finger tap or force click we can do the following:
- Create a MIDI region in an empty part of a MIDI track, or import an audio file in an audio track.
- Create (or delete) notes in Piano Roll/Score and also markers in the time ruler.
- Create two automation nodes around a region.
- Toggle Zoom Focused Track on a track header. Below the header, it creates a new track.
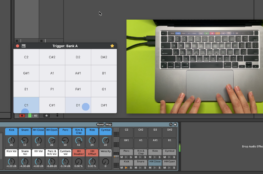
AudioSwift — Your trackpad as a MIDI controller
With lots of music-makers working on MacBooks, using the multitouch trackpad as a MIDI control surface is an advantage. This could mean less equipment to carry for the mobile composer working at the coffee shop, or the producer tweaking a mix in a 7 hours flight.
AudioSwift is an app I developed that transforms the touches into MIDI commands, making the trackpad an expressive tool for virtual instruments and a control surface for mixing and automation. It works through five controller modes. Do you design sounds with Serum, u-he Zebra or Native Instruments Thrill? Great! Control multiple performance parameters in real time with the X/Y mode. Want to create a quick beat? Tap the trackpad as trigger pads. Need to compose a string section? Play your MIDI keyboard with one hand while the other controls CC1 and CC11 with the trackpad working as virtual sliders. Set the controllers to return to a default value after lifting the fingers.
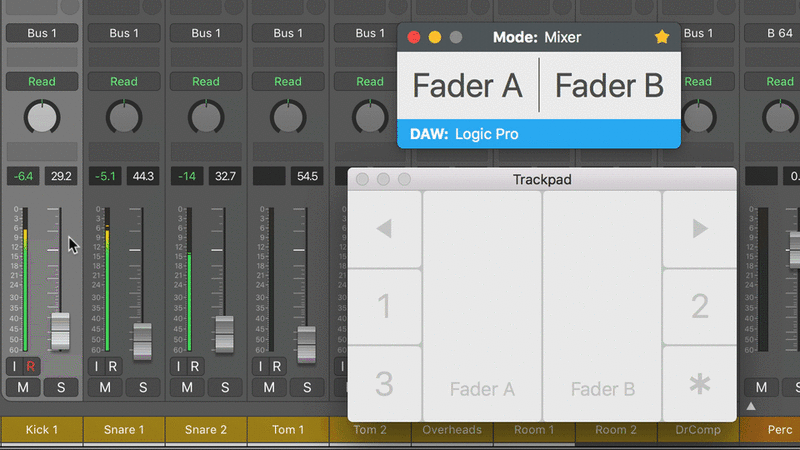
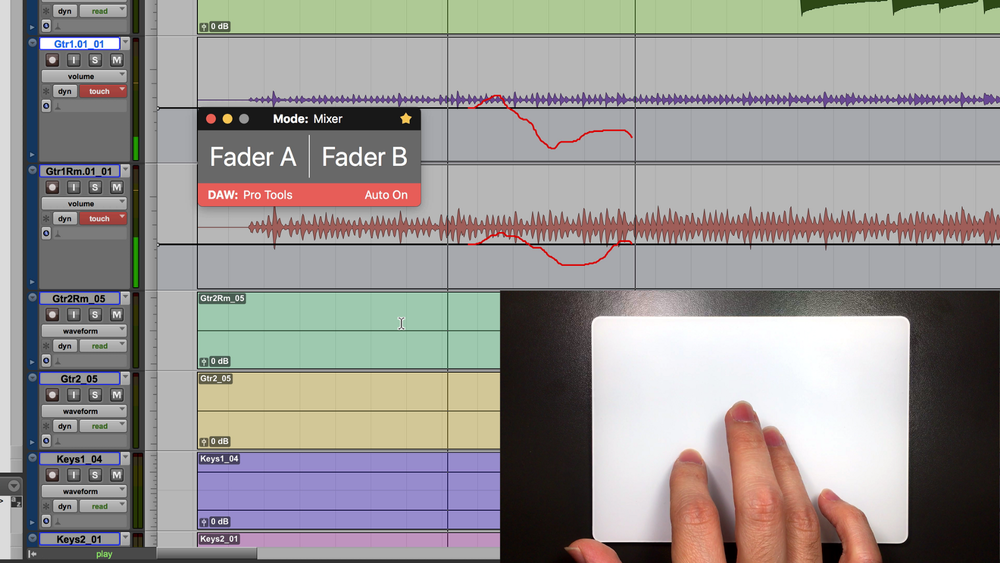
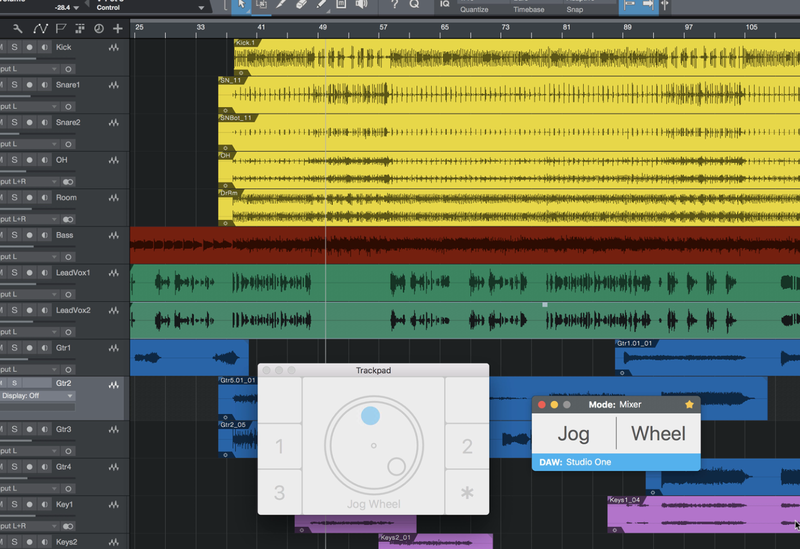
AudioSwift also has the Scale mode for playing notes in a chosen key and the Mixer mode for quick access to two faders at the same time, panning, or a handy jog wheel for navigating through the timeline. Desktop producers can also benefit by adding a Magic Trackpad to their setup. Use one hand for editing with the mouse and the other for controlling the faders with a trackpad.
A four or five finger tap activates AudioSwift; pressing the Esc key turns it off. Press ⇧ immediately after tapping the trackpad and AudioSwift will be active until you release the ⇧ key. This way you could be editing a track or tweaking a plug-in, and then turn on AudioSwift temporarily to quickly move the fader, or put the track in solo without the need of reaching out each parameter on screen with the pointer.
With a Magic Trackpad and a mouse combo (or using two trackpads), AudioSwift can also be configured in order to be automatically activated by just touching the trackpad, and turned off by moving the mouse again. Since a Magic Trackpad is small and wireless, it can be placed anywhere on the desktop or close to the main MIDI keyboard — a great tactile setup for the home producer!
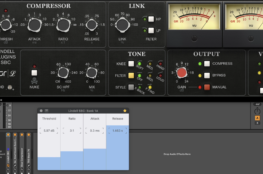
Custom shortcuts with BetterTouchTool
If your DAW lacks a better integration with the trackpad gestures, there’s a workaround: BetterTouchTool by folivora.ai. I’m not affiliated with the developer but I find it’s a fabulous app that lets you customize shortcuts for the keyboard, mouse, touch bar and of course a trackpad.
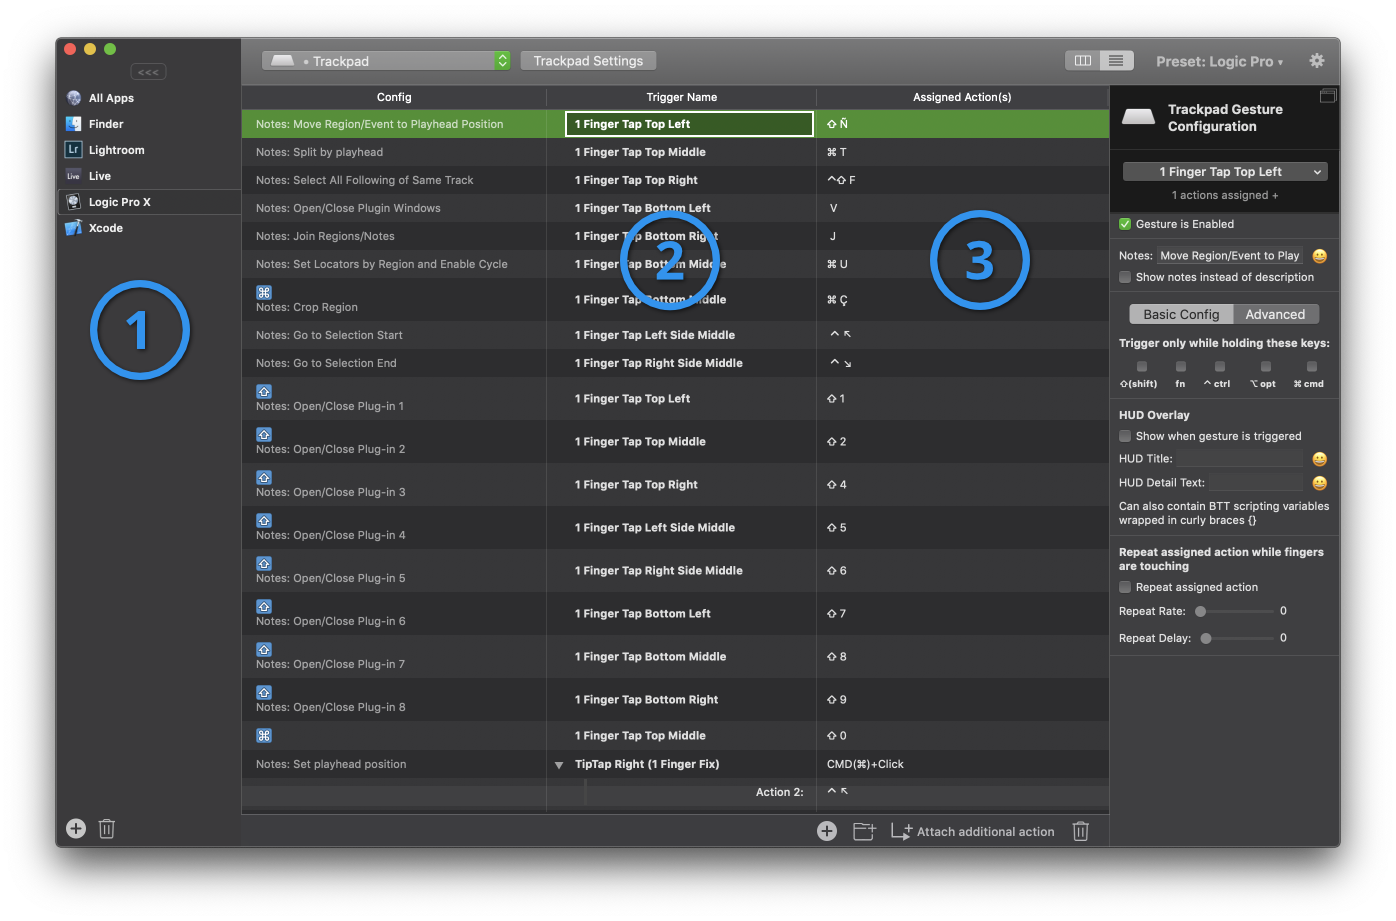
Below is the Preferences window. At the left column (1) we choose the application we want to assign shortcuts. When we add a new trigger to the table, under the column Trigger Name (2) we add a gesture and under Assigned Actions (3), the corresponding key command in the DAW. All gestures assigned will appear in the table. They can have a modifier key like ⇧ or ⌘, so the same gesture can be used for multiple commands. The only limit is how many your memory can handle.
Music producers often require to work with two different DAWs. Assigning a gesture to the same commands in both applications (e.g. join regions) gives the opportunity for only memorize one gesture instead of two different key commands.
AudioSwift works well with BetterTouchTool as long as there isn’t a gesture assigned to All Apps at the left column (1)— this could accidentally trigger a command while using AudioSwift.
Let’s take a look to the list of trackpad gestures assigned in Logic Pro. I’ve chosen finger taps at the border of the trackpad instead of swipes or other gestures, because they’re more precise to execute and are easier to remember. There are eight possible border zones: three at the top, three at the bottom, and two at the middle. I use the ⇧ key as a modifier to have more options.
With simple taps I can move a region to the playhead, join regions, close all plug-in windows, set locators, etc. In Logic Pro there is the option of opening and closing each plug-in insert on a selected track using a key command. So I set the corresponding key commands in Logic Pro’s Key Commands window, and in BetterTouchTool assign a gesture to them. Now I can open a specific plug-in with a tap.
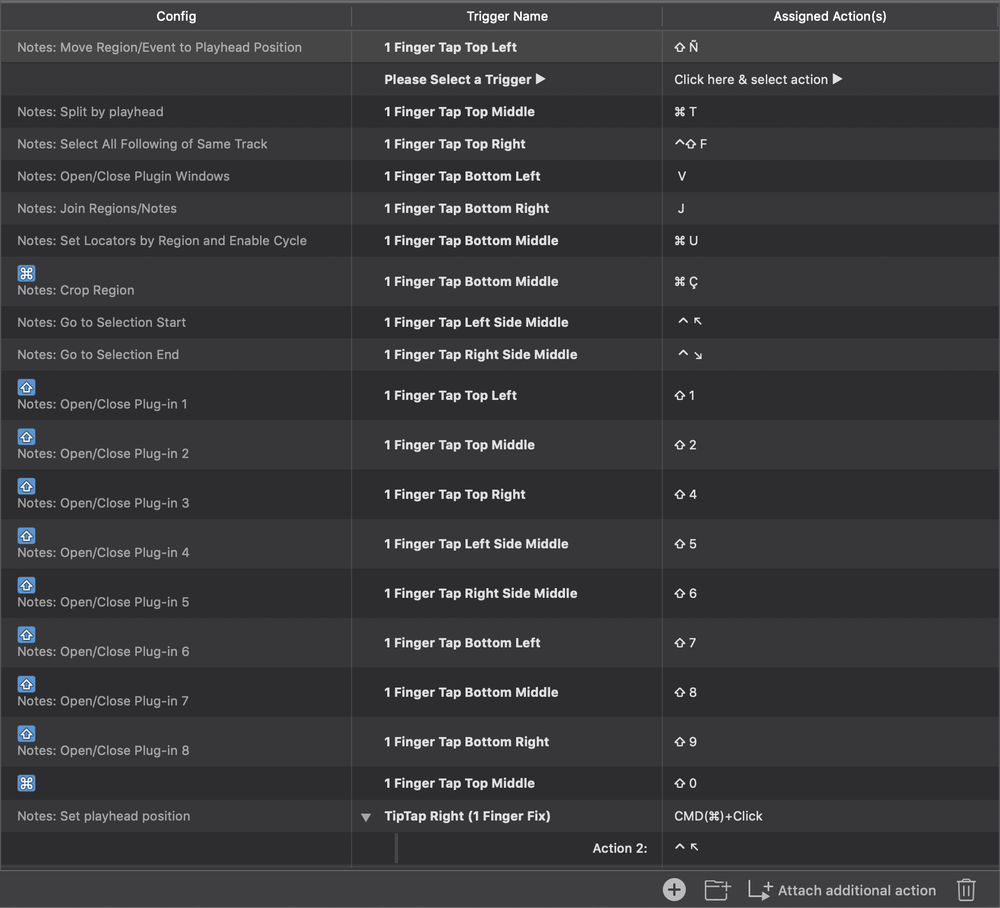
These are just examples of shortcuts you can implement in your DAW. The last one in the list is special — it triggers two actions in a sequence. TipTap Right (1 Finger Fix) is a gesture that consist on touching the trackpad with one finger and then immediately tap with the next finger available to the right. Since I normally use my right hand middle finger to move and tap with my index, I can use this gesture for something else: to set the position of the playhead by tapping anywhere in the Arrange window in Logic Pro.
Setting the playhead position in Logic Pro with a click
For Logic Pro users, we can only do this if we click in the lower half of the ruler, or ⇧+Click in an empty space of the Track area. We can also use a Marquee Tool, click and play from that position. However, setting up the playhead to a particular position by just clicking on a region is not available.
A trick I use as a workaround is apply a sequence of actions to the TipTap Right gesture. The first one is the predefined action ⌘+Click. This set the secondary tool (which in my case is always the Marque Tool), and put a thin line in the region. Then the second action is the key command for Go to Selection Start in Logic Pro or ⌃↖. (NOTE: the ↖ in compact keyboards can be found by pressing fn+← arrow.) This moves the playhead to the position where the marquee is. From there I can zoom in, edit the region or hit play. Of course this trick will work as long as the secondary tool is the Marque Tool. If it’s changed to the Fade Tool for example, it will trigger the wrong action.
You can download my Logic Pro BetterTouchTool preset from here.
Try it out!
I hope you’ve enjoyed this guide and picked up some good ideas to speed up your workflow. Let me know if you have questions or tips you want to share in the comments section below. You can also contact me via email, Facebook, Twitter and Instagram. If you’d like to try out AudioSwift and BetterTouchTool, there are free trial demos available at each site.